This post may contain affiliate links. Please read our disclosure policy.
Peppermint bark is the classic holiday treat that everyone loves. Smooth, sweet chocolate combines with cool peppermint to make a delightful homemade candy that people just can’t get enough of.
Whether you want a dessert for a party or a gift for a friend, Peppermint Bark is perfect for almost any holiday occasion.

Like Easy Chocolate Peanut Butter Fudge, peppermint bark is a cinch to make and requires just a few ingredients you probably already have in your pantry.
Put it in a pretty tin to give as a gift, display it on a dessert tray at your holiday party, or serve it along with a bowl of homemade popcorn at family Christmas movie night.
Once you’ve made peppermint bark at home, the odds are good that you’ll never be tempted to buy it again.
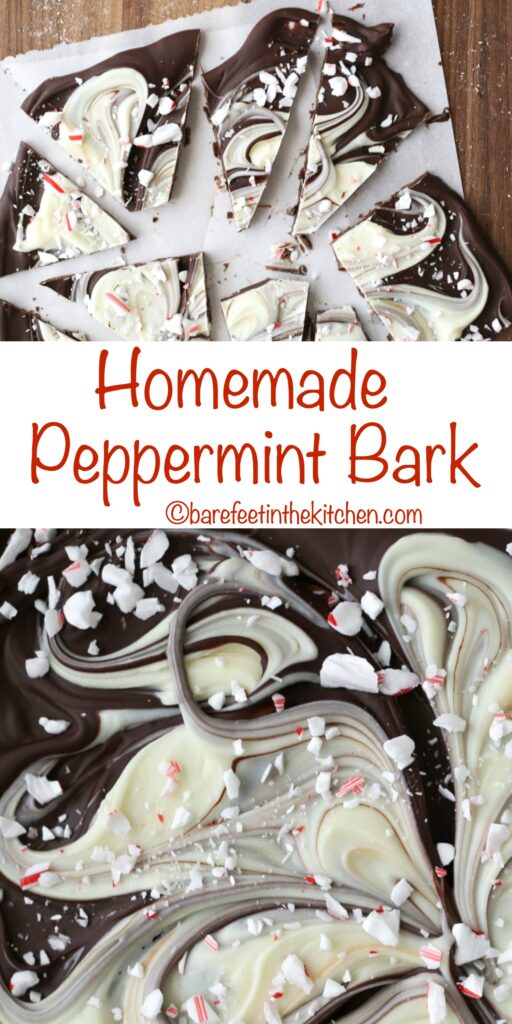
Peppermint Bark
Your journey to Christmas joy in the form of delicious homemade peppermint bark begins with lining a baking sheet with parchment paper. Don’t skip this step or you’ll end up finding yourself desperately trying to get your peppermint bark out of the pan in one piece.
Peppermint extract is how we achieve that airy minty flavor. This extract is incredibly fragrant and flavorful so you don’t need a ton to achieve the right balance of chocolate and mint that makes peppermint bark so delicious.
After layering the white chocolate on top of the melted dark chocolate, crushed candy canes help pull the whole thing together. Not only do the candy canes add a seasonal flair to your holiday treat, they also add a spectacular crunch and extra dose of wintery peppermint goodness.
Tips for Melting Chocolate
A microwave is the best and easiest way to melt chocolate with as little hassle as possible. Use a microwave safe bowl and heat the chocolate in 30-second increments, stirring at each interval.
The most important thing to remember is not to heat chocolate at full power. I keep my microwave at half-power during this process. This method of melting results in smooth, velvety chocolate that retains all its yummy flavor.

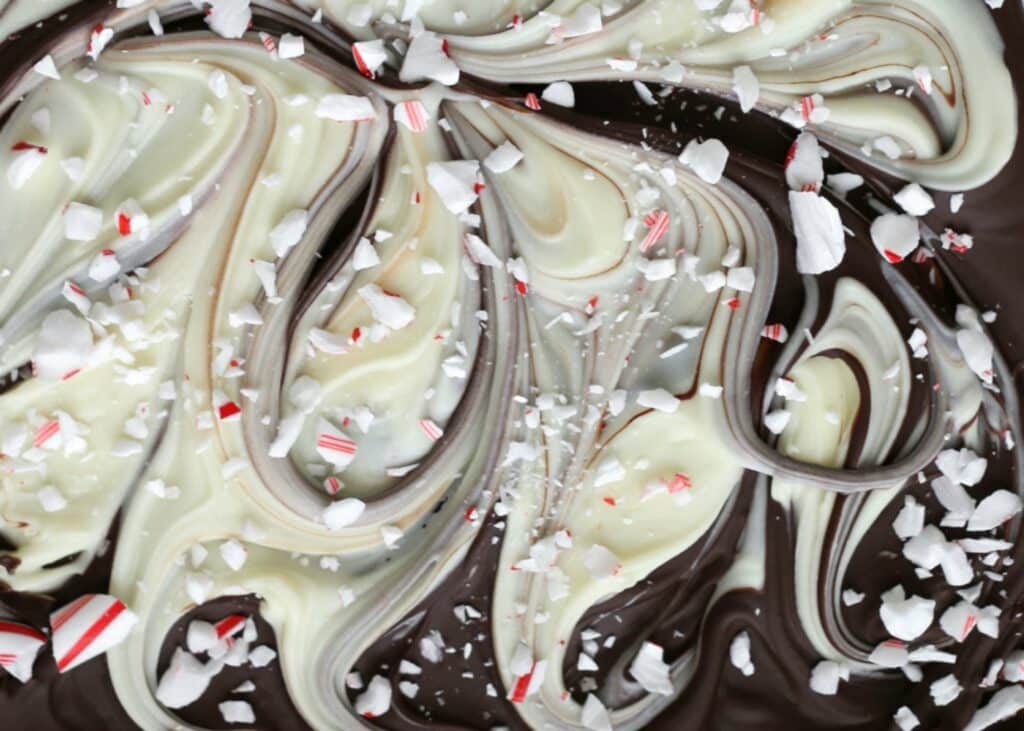
Swirling Chocolate
Some peppermint bark recipes call for a full layer of white chocolate on top of milk or dark chocolate. I choose to swirl the chocolates together for a couple of reasons:
First, the two different colored chocolates all swirled and spiraled together looks so much prettier. It’s visually stunning and is sure to impress when seen on a cookie tray.
Second, it helps keep both kinds of chocolate together during the cutting process. This way you get all three main flavors–white chocolate, dark chocolate, and peppermint–in each and every bite of peppermint bark.
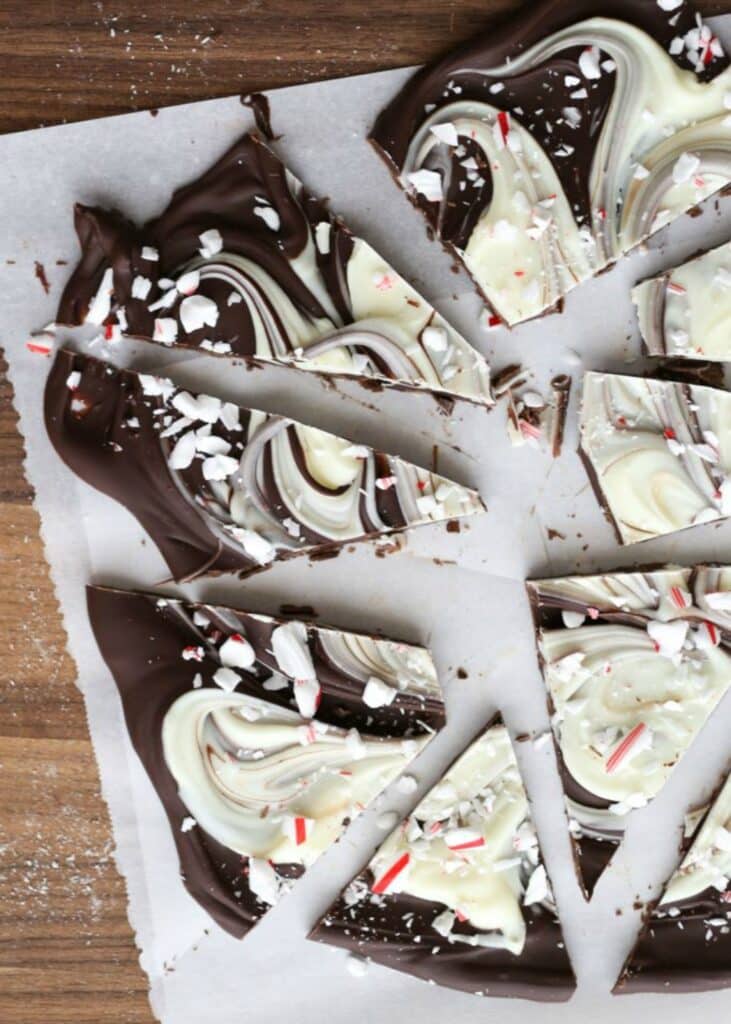
Cutting Peppermint Bark
When cutting peppermint bark, use a very sharp knife to make neat and even slices. I cut my bark into little triangles but you could also cut yours into rectangles or squares.
It’s nice to have all the peppermint bark pieces roughly the same size but if you have a few odd ones, that’s totally okay. You’ll love having a few small pieces leftover for nibbling!
One of the many appeals of homemade treats like peppermint bark (as opposed to cupcakes or Christmas cookies) is that it requires little skill in the way of decoration.
Peppermint Bark Recipes
For all the flavors of Peppermint Bark in cake form, check out Chocolate Candy Cane Cake.
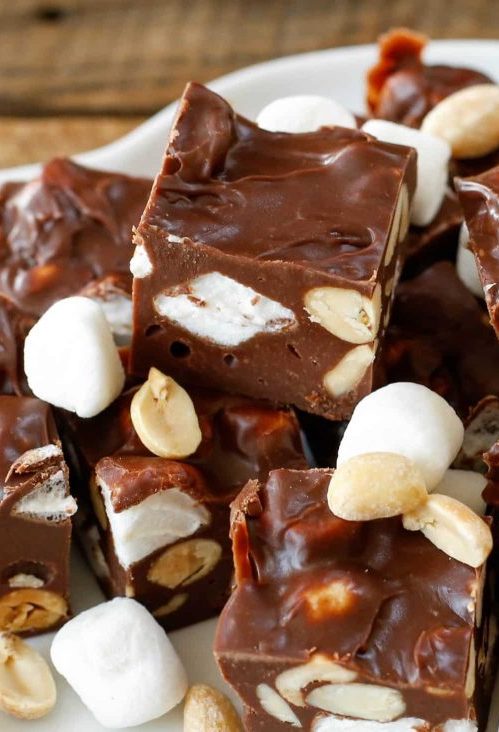
If the “bark” part of Peppermint Bark is what you’re after, you’ll also love Rocky Road Chocolate Bark! That’s a recipe you could make alongside peppermint bark for folks in your life who might not be wild about peppermint.
How To Make Peppermint Bark
- Line a large baking sheet with parchment paper. Place the white chocolate and the semi-sweet chocolate into two separate glass bowls. Add 1/4 teaspoon of peppermint extract to each bowl.
- Place the dark chocolate in the microwave and heat 90 seconds, as 50% power, do NOT heat at full power. Stir and heat an additional 30 seconds at 50% power. Stir again until smooth. Pour the chocolate onto the parchment lined baking sheet and use a spatula to spread it across the paper.
- Repeat the melting process with the white chocolate. Spoon the melted white chocolate over the dark chocolate.
- Use a knife or the edge of the spatula to lightly swirl the chocolates together. Sprinkle with the crushed candy canes. Refrigerate until firm.
- Use a knife to cut the bark into pieces. Store in an airtight container for up to two weeks.

{5 Minute} Peppermint Bark
Ingredients
- 12 ounces white chocolate chopped or chips
- 16 ounces semi sweet or dark chocolate chopped or chips
- 1/2 teaspoon peppermint extract divided
- Topping: 10 mini candy canes crushed, about 2-3 tablespoons worth
Instructions
- Line a large baking sheet with parchment paper. Place the white chocolate and the semi-sweet chocolate into two separate glass bowls. Add 1/4 teaspoon of peppermint extract to each bowl. Place the dark chocolate in the microwave and heat 90 seconds, as 50% power, do NOT heat at full power. Stir and heat an additional 30 seconds at 50% power. Stir again until smooth. Pour the chocolate onto the parchment lined baking sheet and use a spatula to spread it across the paper.
- Repeat the melting process with the white chocolate. Spoon the melted white chocolate over the dark chocolate. Use a knife or the edge of the spatula to lightly swirl the chocolates together. Sprinkle with the crushed candy canes. Refrigerate until firm. Use a knife to cut the bark into pieces. Store in an airtight container for up to two weeks. Enjoy!
Notes
Nutrition
Nutrition information is automatically calculated, so should only be used as an approximation.
{originally published 12/15/14 – recipe notes and photos updated 12/22/20}


Not to be picky, but where does the peppermint extract go? I read the recipe twice and checked the printable version and neither specify.
The peppermint oil is divided between the two bowls of chocolate. Thank you for catching that, Marcie. Enjoy!
Wow! This looks amazing. Did you say {5 minute}?! With all we have to do during the holiday season, it's nice to have a simple treat ready to share.
A little longer than 5 minutes for me. Crushing the candy canes and the baker's chocolate made it longer. The chocolate melting time alone totals 4 minutes. Allow cleanup time. Still a great timesaver, and very pretty. I swirled more than the picture, so it's not quite as pretty as shown, so swirl sparingly. After spending 15-20 minutes in the kitchen it's deliciously cooling in the fridge. 20 minutes is enough cooling. Size your baking tray small enough if you want straight edges. My cookie sheet is 12" X 18", probably 2-3" too wide each way. Will still taste great and impress the friends who'll receive it.
Wow this looks amazing!
Can you freeze this?
Yes, chocolate barks will freeze fine. However, it will also keep in the refrigerator for quite a while. Enjoy!
Made this last night and it turned out great! The swirled chocolates are a lovely touch – mine also didn’t turn out quite as pretty as the pictures here, it would be super helpful if there were a video or just more detailed instructions just for the swirling part. But this is definitely a keeper and will be part of my Christmas baking from now on!
do I change the micro time if doubling?
I would start with the original time settings and add more in thirty second increments, stirring in between, until it has melted. Enjoy!
Do you not need any shortening i the chocolate to melt it? My experience has been the chocolate turns into a big hard good of chocolate mess.
“GOO” of chocolate mess……
This was super easy and a lot of fun to do.
My holiday party folks loved it!
Thank you!
So easy and super yummy!!
Thank you I have loved Peppermint all of my life. Now 78 years maybe subtract 6-7 years. My Grandfather (Pappy) asked me what kind of home made Ice Cream I wanted for my birthday. I said Peppermint. I remember him breaking up all those Peppermint sticks my Grandmother used for Peppermint tea and I think it was for my 7th birthday as I was visiting in August to their home in Dallas. I grew up mostly and lived in L.A. and I so remember cranking that old ice cream freezer with all that rock salt and water and waiting for that wonderful ice cream to finish. Never had it since that I can remember but it was wonderful to be so special that hot Summer day in Dallas in Pappy’s back yard.
This is one I will certainly make as soon as I can get more ingredients. Maybe for New Years Day. Thanks again. Nancy E.
Your recipe calls for 1/2teaspoon of peppermint extract but the instructions said 1/4teaspoon of peppermint extract which one is it?
It’s a 1/2 teaspoon TOTAL. You’ll add 1/4 teaspoon of extract to each bowl of chocolate.
Unfortunately I have to stick with the white chocolate items as I am allergic to chocolate. But still love seeing the recipes.
I’m glad you’re enjoying the recipes, Brenda.
Mary, You’ve gone and done it again. You have amazing recipes and many simple enough for even someone like me to make. Yours always turn out so beautiful. Looking forward to making this!
Enjoy the chocolate bark, Cheryl!
you can always color 1/2 of your chocolate
What size baking sheet do you use for this recipe?
I use a large sheet pan (roughly 17×12) but you aren’t going to spread this to the corners, so honestly, just about any large pan will work.
I made this peppermint bark and it was AWESOME!!!! Thanks for the recipe
I’m so glad that you like the bark, Shirley.
I wanted to love it, but it ended up WAY too minty – probably about half the extract (1/8 tsp in each kind of chocolate) would have been plenty).