This post may contain affiliate links. Please read our disclosure policy.
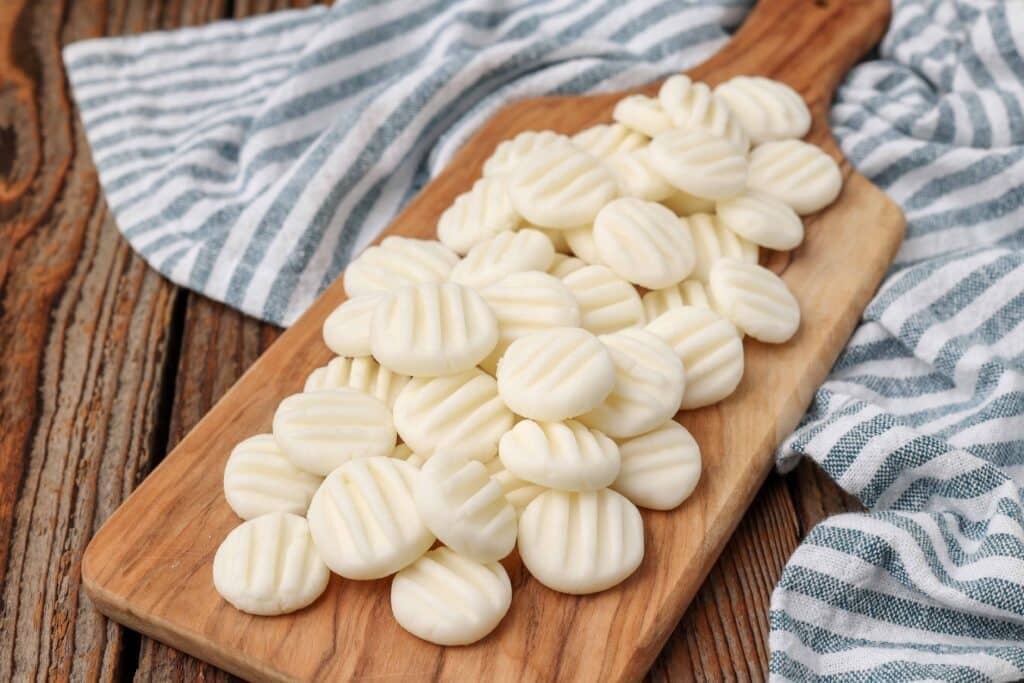
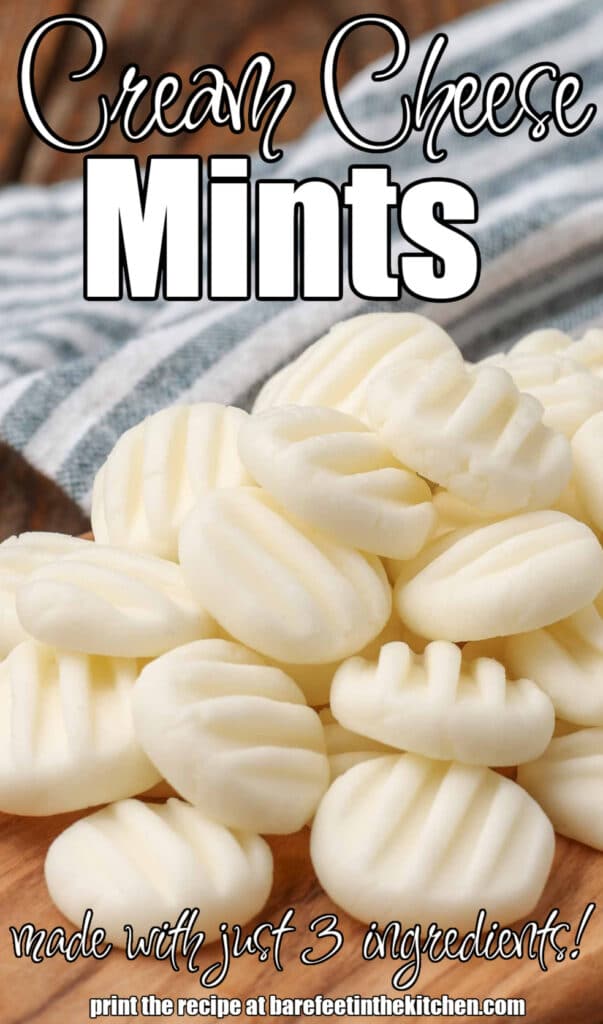
Cream Cheese Mints melt in your mouth with a sweet peppermint flavor. They’re an old-fashioned holiday candy recipe that is a favorite for many people.
Kept pure white or colored however you like, pressed into molds or simply rolled and pressed with a fork, however you make these mints, they’re one of the easiest candy recipes of all time.
This recipe brings back a flood of memories for me. I remember sneaking to the dessert table more than a few times during my cousin’s wedding reception when I was a little girl and discovering these amazing little mints.
Wedding Mints
The mints I first tasted at my cousin Helene’s wedding were sweet minty delights that melted in my mouth. I was completely obsessed at first bite. I’d never had them before and they were irresistible!
After discovering cream cheese mints, I ate myself sick on them almost every time they were within reach. I grew older but my inability to control myself around these mints remained.
Years later, I discovered how easy they were to make when my friend Augusta shared her cream cheese wedding mints recipe with me.
I couldn’t believe how simple it was to make these candies! There are just three ingredients and you can dress them up however you like.
Cream Cheese Mints Recipe
Thanks to that childhood memory of gorging myself on Cream Cheese Mints at a wedding reception, this recipe for cream cheese mints is what I think of as a classic wedding mint.
Homemade mints are so much easier to make than I ever imagined. Unlike many homemade candies, cream cheese mints and old-fashioned butter mints don’t require any fancy ingredients or special equipment.
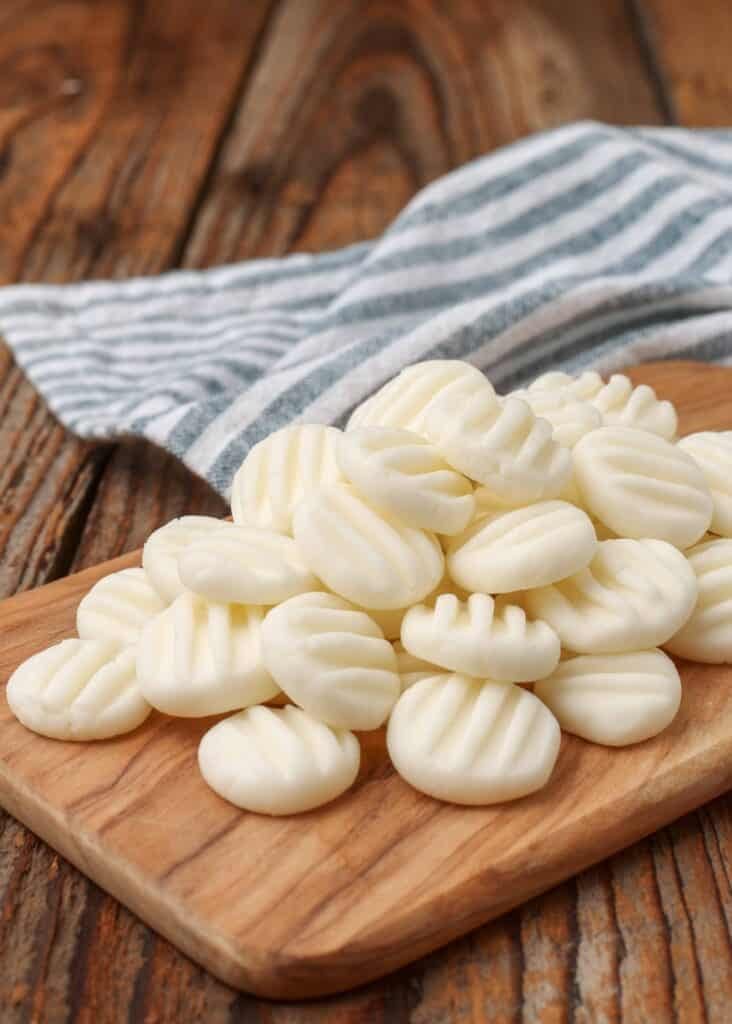
A combo of these mints on a dessert table is the perfect finishing touch for a holiday party. They’ll make a great addition to your cookie trays too.
You’ll only need three ingredients to make these cream cheese mints:
- cream cheese
- powdered sugar
- peppermint extract
That simple combination of ingredients creates a creamy sweet base that’s delicious just as is or as a canvas for adding fun extras.
Feel free to play with the recipe and find your favorite way to make them. You can press them into these silicone molds, roll them in sugar, or add food coloring if desired.
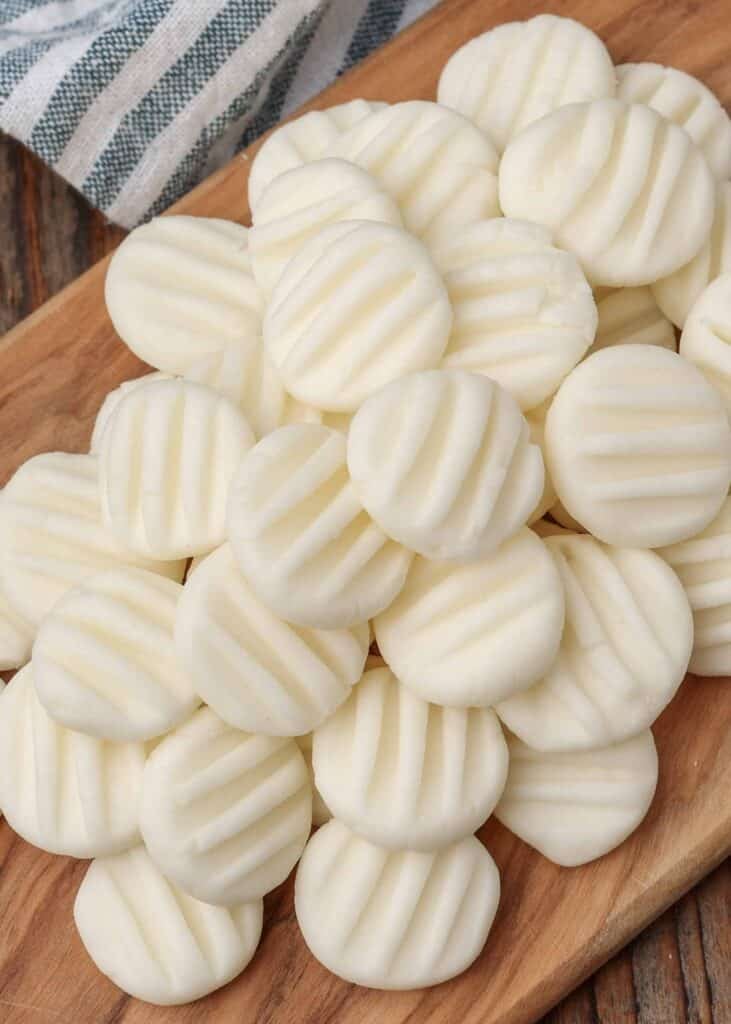
No matter how you present, style or decorate them, Cream Cheese Mints are a delightful treat. Cool, sweet, and creamy enough to dissolve on your tongue, these homemade mints are every bit as delicious as those candies I remember from childhood.
In my book, you don’t need any special occasion to make these mints. They’re just as good to nibble on for an afternoon pick-me-up or an after-dinner treat as they are at a party or reception.
If you’re just as delighted as I was to find out that homemade mints are not intimidating, complicated, or difficult to make, I know you’ll want to play with making all kinds of variations!
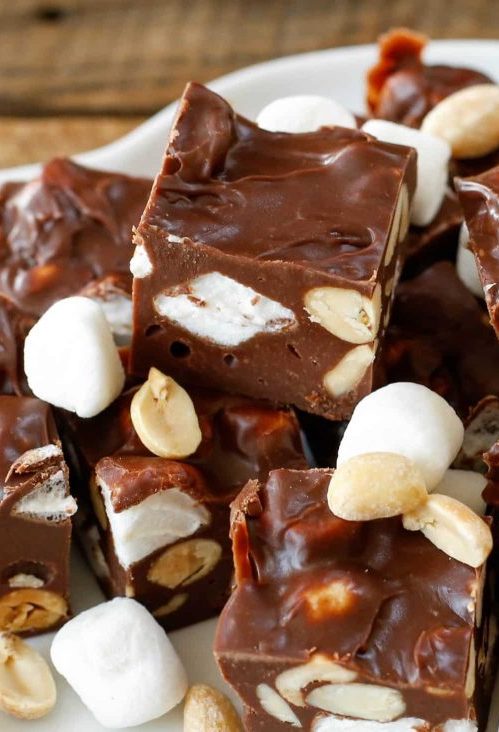
These Homemade Junior Mints take this Cream Cheese Mint base and cover them in melted chocolate. They are definitely on my list for snacks to make alongside a bowl of popcorn the next time we have a movie night.
Speaking of desserts with chocolate and peppermint, be sure to give these 3 Ingredient Homemade Thin Mints a try, too. No more waiting for Girl Scout cookie season to enjoy those famous cookies.
How To Make Cream Cheese Mints
The first step when making cream cheese mints is bringing your cream cheese to room temperature. Once it is soft and pliable, beat the cream cheese with a handheld mixer (or in a stand mixer) until completely smooth.
Then add half of the powdered sugar and the peppermint extract. Beat again to incorporate the sugar fully into the cream cheese.
Every time I include peppermint extract in a recipe, I caution you to be extra careful when measuring the extract. Even the slightest amount of extra mint flavor can result in accidentally making candies that taste more like toothpaste than peppermints.
Add the remaining powdered sugar and beat again until well combined. If the mixture is too dry and crumbly to press together, add just a half teaspoon of water to the bowl. Beat again and repeat ONLY as needed, taking care to add the tiniest bit of water possible.
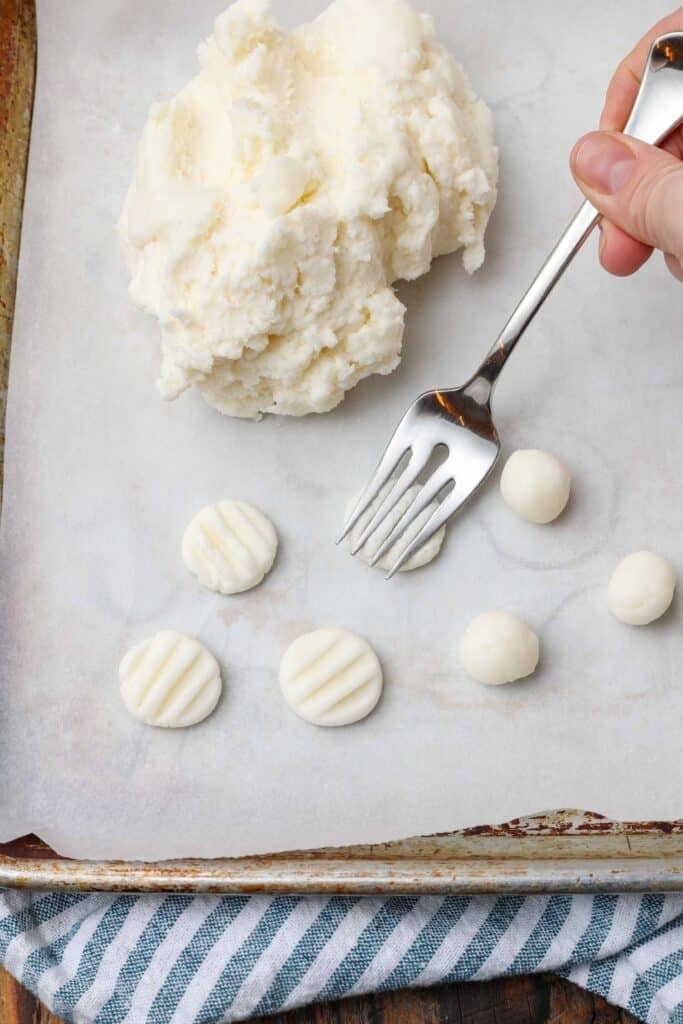
To create round mints, use your hand or a small scoop to shape the cream cheese mixture into 1/2-inch balls. Place the balls on a tray or cookie sheet lined with parchment paper then press each ball with a fork to flatten.
(You can also dip each ball into colored sugar or sprinkles before flattening, if you like!)
Chill your mints until ready to serve. These morsels keep well in the fridge for up to two weeks or in the freezer for two months.
If you enjoy making your own mints and candy, be sure to check out some more of the other homemade treats I’ve shared here.
These Homemade Almond Joys with Dark Chocolate are even better than store-bought coconut candies and they put a smile on everyone’s face. I make them every year around Easter and Christmas.
Along with coconut candies, I can’t let a holiday season go by without whipping up a batch (or 12) of my 5 Minute Peppermint Bark.
If, after all that, you still can’t get enough of the chocolate and peppermint combo (I know I can’t), move along to Chocolate Covered Candy Cane Marshmallows. They’re festive, easy to make, and beloved by kids and grown-ups alike.

Cream Cheese Mints
Ingredients
- 4 ounces cream cheese room temperature
- ½ teaspoon peppermint extract
- 3 cups powdered sugar
Instructions
- Beat the cream cheese with a mixer until smooth. Add the peppermint extract and half of the powdered sugar. Beat to combine.
- Add the remaining powdered sugar and beat again until well combined. If the mixture is too dry and crumbly to press together, add just a half teaspoon of water to the bowl. Beat again and repeat ONLY as needed, taking care to add the tiniest bit of water possible.
- Use your hand to shape into small 1/2" balls and place them on parchment-lined tray. Press flat with a fork and then chill until ready to serve. Store in the refrigerator in an airtight container for up to two weeks or freeze for up to two months.
Video
Notes
Nutrition
Nutrition information is automatically calculated, so should only be used as an approximation.
{originally published 12/5/13 – notes and photos updated 12/8/22}


So fun and yummy! I could let the kids make these. I'm glad you gave us the little tip on these going from mint to toothpaste….I can totally see myself doing that:-).
What a neat idea — and I love anything that is THIS easy to make. Thanks, Mary!
Hobby Lobby sells soft rubber molds to make different shapes with these–for wedding/baby showers, etc.
55 yrs. ago at this time I was making these for our wedding reception at Trinity Methodist Church in Anderson, S. C. Back in the dark ages you had wedding receptions at your church and served wedding cake, punch, mints..Boy have wedding receptions changed.
Could I change the pepprrmint to almond
Sure. I bet they would be delicious.
Ok, how is it that I've never heard of these? They're adorable!
I used to make these every year … to make them even more special, add a few drops of food coloring!!
Do you sift the powdered sugar first before measuring? Or at all???
I do not sift the powdered sugar at all, Allison.
Pinned. I love the sound of these!
Fun idea. Thank you for sharing.
Guess what, I have never had one! So I have to try this. Thanks again.
Made these today, thanks for the recipe…so easy and oh so good.
Fantastic! I love this simple homemade recipe for mints. It's always nice to make your own candy so you know what's really in it. Just pinned this recipe and will definitely be making these this week.
Sweet and simple!
Thank you for all that you do!
Pinned,
K-
I'm not a mint fan, what about vanilla flavor?
Vanilla might work. I'm planning to try them with almond as well, so that might be an option for you too.
Vanilla is actually one of my favorite flavors to use with these.
I want to dip them in chocolate!
These look so easy and fun to make. I wonder how they would be with citrus flavors — lime, lemon & orange; with a touch of finely grated zest and the citrus oil. This really calls to me. What do you think? I just need to get some citrus oils. I all out.
Sounds delicious. I bet all of those variations would be lovely!
I have made lemon and orange using artificial flavoring before. I cannot remember how orange tasted to be honest, but lemon was very tasty!
Made these yesterday and cannot stay out of them so good and so easy to make. Thank you
can you add food coloring, for say a colored themed baby shower or would that change the consistency?
Sure. It shouldn't take more than a drop or two to color the whole batch.
I used to help my grandmother and mom make these every year when I was a child. We would use different flavors with food colors to keep them separate. My favorite was the rum and vanilla ones. We had a bunch of the rubber molds too. If you put a little granulated sugar in the mold prior to the mixture it helps it come out cleaner. You can also use the granulated sugar with the fork method. Just roll the ball of mixture in a little sugar prior to pressing with the fork. It helps to keep them from sticking to each other during storage (if they last that long). Thanks for sharing this, it brought back so many great memories!
Just to clarify… the rum was an artificial flavoring… 🙂
I grew up eating ones that were lemon, orange and cherry (almond). These mints seem like such a midwest thing! I'm from Minnesota.
Just a warning- I made these and they are ridiculously addictive!!! They are soooo good and so easy!