This post may contain affiliate links. Please read our disclosure policy.
Preserving garlic, also called pickling garlic, is one of the easiest ways to save your garlic harvest. There’s nothing better than having fresh garlic ready to use all year long.
About ten years ago, I found myself with a huge harvest of hard neck garlic and no possible way to use it all before it began sprouting. I love garlic and cooking with garlic but even so, I knew I needed to figure out how to preserve garlic.
While I’ve canned fruits and vegetables before, I’d never thought to try preserving garlic. My brother Miles visited us last week and was kind enough to spend a couple of hours showing me how to can it.
As it turns out, it is almost ridiculously simple. It’s so simple and so effective that I wish I had learned to do it a long time ago.
We all love having garlic ready to use now in the refrigerator and I’m excited to share my findings with you!
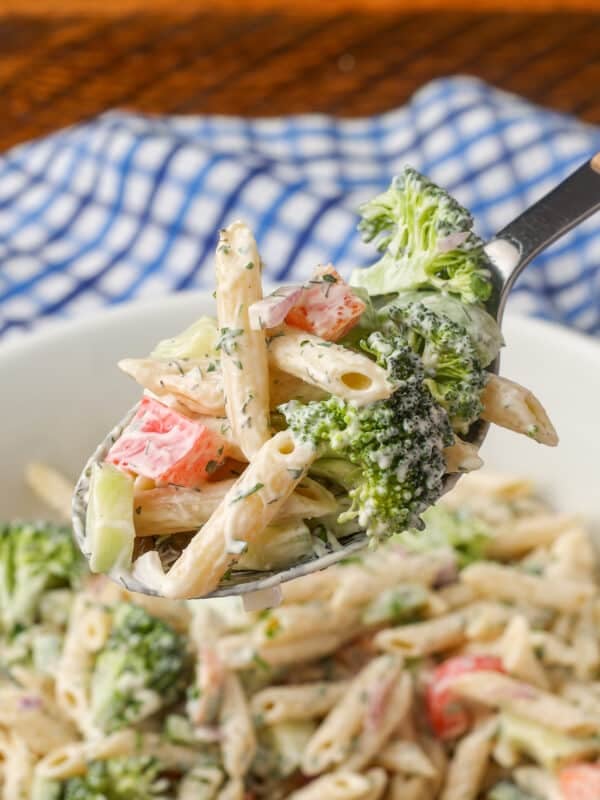
This garlic tastes FRESH. If you’ve ever bought a jar of minced garlic or peeled cloves in oil or vinegar, this doesn’t resemble any of those things. I have used the preserved cloves in a couple of recipes already and the taste is exactly the same as fresh.
How to Preserve Garlic
Raw, dried garlic can be kept for months in a cool and dark environment. However, here in the very warm southwest, it rarely lasts over a month in my home before it sprouts. Preserving it with this easy pickling method helps keep it fresh for months.
Wondering if this method yields garlic with a pickled, vinegary taste? It doesn’t. The natural oils of the garlic prevent the vinegar from being absorbed into the cloves! Handy, right?
To use your preserved garlic, just take out the number of cloves you need, rinse quickly with water, and use as desired. If you want a slight vinegar bite to the garlic, or if you are using it in a recipe that also calls for vinegar, simply use the garlic without rinsing.
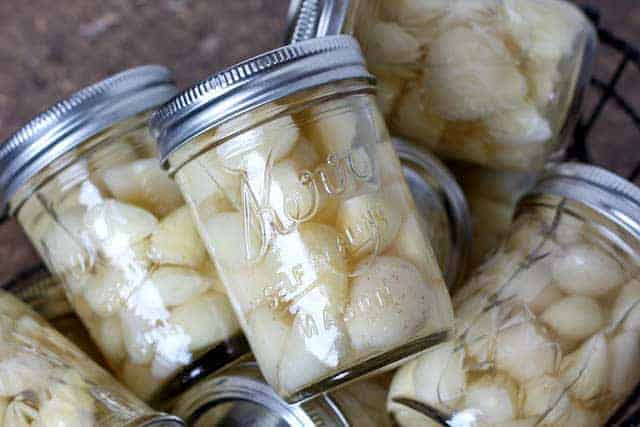
Also called pickling garlic, this method is one of the most common ways to save your garlic harvest. At any given time, you’re likely to find a row of jarred garlic tucked in the back of my refrigerator.
Why Does Garlic Turn Blue
Updated 9/19/12 to answer multiple questions regarding, Why Did My Garlic Turn Blue? If your garlic does turn blue, it is still safe to eat.
This can happen when enzymes and amino acids present in garlic react with the sulfur compounds responsible for garlic’s pungent smell. I’ve seen this happen a few times over the years and apparently, it is fairly common.
Selecting Garlic
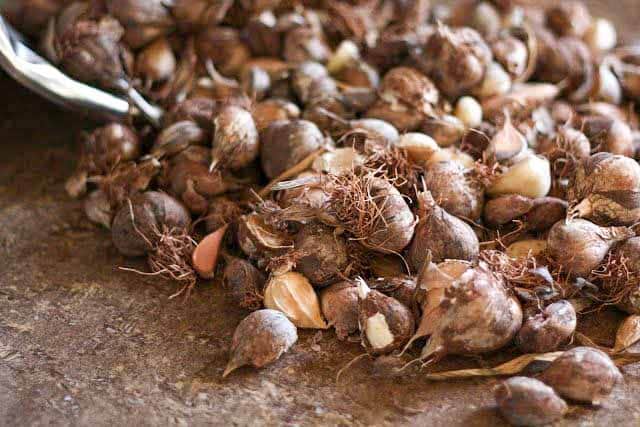
If you don’t grow and harvest your own garlic in a home garden, follow these tips for selecting the best and freshest heads of garlic from your farmer’s market or grocery store to use in your preserved garlic recipe:
First, look for heads of garlic without sprouting. Sprouting is an immediate indicator that the garlic is no longer fresh and not worth your money.
Next, give the garlic a quick “sniff and squeeze.” If it smells mildewy or moldy, give it a pass. That’s an almost sure indicator that the garlic has gone rotten.
Fresh garlic cloves should never be soft or squishy. A fresh head of garlic will be firm to the touch and not yield with a light squeeze.
How to Peel Garlic
Arguably the most time-consuming part of the process of preserving garlic is peeling it. Of course, you can just use your fingers and peel away but if you’re looking for a faster process, or run into a stubborn clove whose skin just won’t peel, here are a few popular tricks.
I’ve tried all of these methods and it really just depends on how much garlic you need to peel, how you plan to use it, or if you’re preserving it.
The method below requires just Two Metal Mixing Bowls and it is my favorite.
- Take your whole head of garlic and place it in a large metal bowl.
- Place another bowl the same size on top of the first bowl so that you have an orb shape.
- Shake the two bowls very hard for about 30 seconds.
Keep in mind that this method works best with older garlic where the skin is already a little loose. Vigorously shaking the garlic in the bowls allows the skins to just break and fall away from the cloves. This method works best when using large quantities of garlic to smash into each other and help the process along.
Likely the most well-known method of peeling garlic cloves in a flash is by hitting the clove with the flat side of the knife. This is handy when cooking, but for this recipe, we want to preserve whole cloves intact so be careful not to smash your garlic if you try this method.
Similar to the bowl method above, you can also place the garlic cloves in a glass jar with a closed lid and then vigorously shake to loosen the garlic skin. This is definitely effective but, the amount of garlic you’re able to process this way is limited.
You can also use the microwave or warm water to heat the garlic slightly, making it easier to peel with your fingers.
Preparing Garlic
Depending on when your garlic was harvested you might notice some brown spots on the cloves. This is perfectly normal and doesn’t mean your garlic is rotten.
After rinsing once, I used a small paring knife to trim off brown spots on my garlic cloves. After all the brown spots are removed, rinse the garlic bulbs a second time and proceed with the recipe as directed.
Storing Garlic
If you use the method outlined in the recipe, you’ll need to store your jars of preserved garlic in the refrigerator to make them last. Designate one side of a shelf or a shelf on the inside of a drawer for your garlic jars. They should stay fresh for several months and even up to a year.
Sticking with this basic refrigerator canning method is by far the easiest and more reliable way to preserve garlic.
While there are multiple sources online that claim pressure canning works, I’ve removed this information, based on a reader review that doing this destroyed her garlic. I stick with my recommendation of preserving garlic in vinegar in the refrigerator. According to the USDA, “Canning of garlic is not recommended. Garlic is a low-acid vegetable that requires a pressure canner to be properly processed. Garlic loses most of its flavor when heated in this way. For this reason, adequate processing times have not been determined for canning garlic.”
How to Use Preserved Garlic
Now that you know how to preserve garlic, you can use that garlic anywhere you’d use the fresh stuff. And believe me when I tell you it maintains all the same aromatic, flavorful goodness of a freshly harvested garlic bulb.
Preserved garlic (rinsed and patted dry) is also amazing roasted! Use it in Roasted Garlic and Bacon Guacamole and be everyone’s new best friend.
I also love garlic as an ingredient in salad dressing, sauces, marinades and savory spreads. It’s just divine in Beer and Garlic Marinade, Mojo Marinade, and in Homemade Ranch Dressing. This Chipotle Garlic Sauce served with roasted fingerling potatoes are a garlic lovers’ dream.
True garlic fanatics NEED to try the Garlic Lover’s Potato Salad. That recipe alone is worth “putting up” a big batch of garlic so you have it on hand anytime a craving strikes.
Give preserving your own garlic a try. I guarantee you won’t be sorry! It’s an easy and money-saving way to ensure you always have garlic on-hand anytime you need it.
Kitchen Tip: I use this pot and these jars when preserving garlic.

Kitchen Tip: How To Preserve Garlic
Ingredients
- Garlic heads broken apart and cloves peeled
- Distilled vinegar
- Large pot for boiling the vinegar
- Jars for storing the garlic
Instructions
- Break apart your heads of garlic and peel the cloves. Place the peeled cloves of garlic in a large mixing bowl and fill with water. Use your fingertips to scrub any dirt off of the cloves. Once the cloves are cleaned, transfer them to a large strainer and rinse well.
- Depending on when your garlic was harvested, you might have very few brown spots on the cloves. My garlic was harvested late this year, so the ends were quite brown with some spots on the cloves as well. Use a small paring knife to trim the spots and then transfer the cleaned and trimmed cloves back to the strainer. Rinse again.
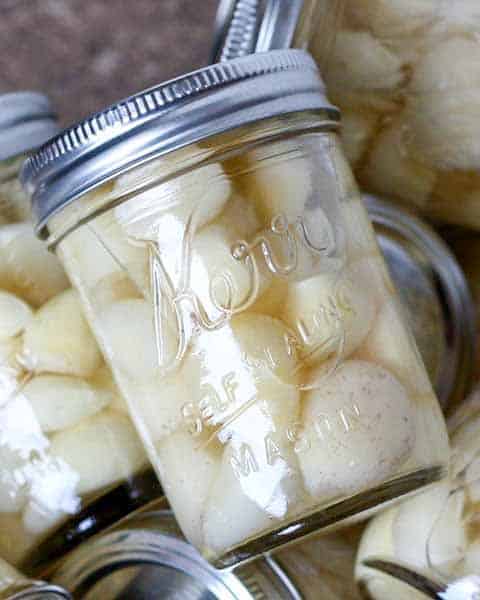
- Bring the vinegar to a boil in a large pot. For several hundred cloves of garlic, I used about 8 cups of vinegar. Place the clean garlic cloves into small jars. (I prefer to use small vs large jars to avoid contaminating a huge amount if the jar is open for too long in the refrigerator.) I filled 10 half pint jars with garlic. Once the vinegar has boiled, pour it over the garlic and screw the lids on tight.
- Let the jars come to room temperature on the counter overnight and then store in the refrigerator. This will keep in the refrigerator for up to a year. Enjoy!
Nutrition
Nutrition information is automatically calculated, so should only be used as an approximation.
{originally posted 9/14/12 – recipe notes and photos updated 5/10/22}


Do I need to use new canning lids to do this?
No, you do not. You’re going to store this in the fridge. It isn’t shelf stable.
should you wait for the boiling vinegar cool down before pour into the jar with garlic ?
You can pour it over the garlic while it is hot, June. It’s fine either way.
Since you are pickling (vinegar) them, you do not need to use a pressure canner. I would use this recipe, pour the vinegar over and process them for 10-15 minutes like you would do pickles. Frees up some refrigerator space. I grow my own and am going to do this soon. The hard neck garlic just does not store well. I love them for their larger cloves and they are easier to peel.
I have used this recipe for years and have always had beautiful crisp garlic for up to a year. I have found the left over vinegar wonderful in cooking as well.🤗
YAY!! I’m so happy to hear it.
Question: Can this be used for minced/crushed garlic?
You bet, Blynn.
Is there anyway to can garlic and store on a shelf? I don’t have extra fridge space and was given a lot of garlic. It is all from a store so it’s been peeled and packaged in an air tight package. Or could I just store in the package it’s in?
I haven’t tried that myself, Tonya.
My Garlic turned Blue with with this method. I’m not sure why
If your garlic does turn blue, it is still safe to eat. This can happen when enzymes and amino acids present in garlic react with the sulfur compounds responsible for garlic’s pungent smell. I’ve seen this happen a few times over the years and apparently, it is fairly common.
Can I use apple cider vinegar?
I suppose that would work fine, I haven’t tried it myself.
can I use the food safe plastic lids instead if the metal.
the process is so simple
thanks Mike
Yes, you can store the garlic in the fridge with the plastic mason jar lids. However, I would not plan on reusing those lids. When I’ve done that in the past, the garlic is a permanent fragrance for the lid in the future.
Will this give the garlic a vinegar flavor, or pickled flavor? My husband has an extreme aversion to vinegar/pickles.
I’ve been using this garlic for years and have never noticed any vinegar taste and I’ve never heard that from anyone else. That said, you might want to try just doing a single head of garlic initially and making sure it won’t be an issue for you.
Very simply put the instructions. I will try to follow your recipe and see the result.
I try to use garlic,chili,ginger,turmeric and bit of salt and make a paste.This is eaten as chutney with any food that is blend, The word chutney comes from India—meaning to lick .This mixture is great tasting but eaten in small amount because of the hotness provided by chili and garlic.Thanks
I’m glad this is helpful!
do I have to use vinegar how about hot water
The vinegar helps with the preservation, Judith.