Homemade Butter Mints are old-fashioned, buttery, sweet, minty candies that melt in your mouth like no store-bought candy you have ever tasted.
I’ll go ahead and tell you that these innocent looking mints are absurdly addictive. I found myself walking through the kitchen several times today, just to taste one more, and then one more.
I used to love after-dinner mints, but I haven’t had one in years. The last ones I tried were dry to the point of being crunchy and the taste was so toothpaste-like I decided not to buy them again. These are nothing like that!
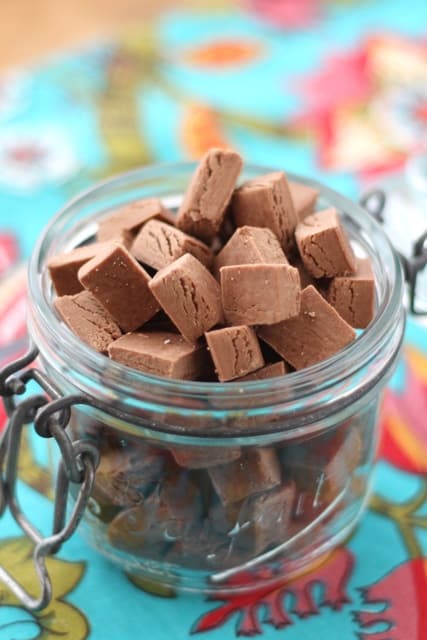
I found this recipe for Old Fashioned Butter Mints over at Averie Cooks and it’s a keeper! I’ve played with it a bit to make a chocolate mint as well and you’re going to love both versions.
Don’t be intimidated by the idea that this is candy making. These mints took far less time to make than I expected. (seriously, it was well under an hour from start to finish!) If you can roll play-dough, you can make these homemade butter mints!
If you’re looking for a few more sweet treats to make, these Cream Cheese Mints are beyond easy to make and they disappear almost as fast as you can make them. Old Fashioned Potato Candy is another fun candy to make that only requires a few minutes of effort in the kitchen. (I promise you can’t taste the potato at all!)
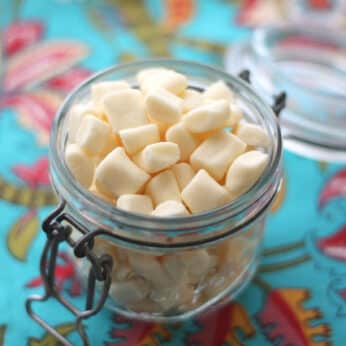
Homemade Butter Mints & Chocolate Butter Mints
Ingredients
- 1/4 cup butter softened
- 1/4 teaspoon kosher salt
- 1/3 cup sweetened condensed milk or this homemade substitute for condensed milk
- 3 1/4 cups powdered sugar *
- 1/2 teaspoon peppermint extract **
- Optional: ¼ cup cocoa powder * reduce the powdered sugar by the amount of cocoa used
Instructions
- In a mixing bowl, combine the soft butter and salt. Beat for a moment to combine. Add the condensed milk and beat again to combine. Add the powdered sugar a cup at a time, beating to combine thoroughly. Add the peppermint, taste and adjust as needed. The dough will be mostly crumbs, but should stick together when squeezed into a ball. It should not be sticky at all.
- Remove the dough from the mixer and pull off golf ball size sections. (At this point, you can also wrap the dough tightly and store it in the refrigerator until you are ready to roll them out.) Roll each ball out into a long skinny strip about 1/2" in diameter. Slice the strips into tiny mint-size pieces. I used a pizza cutter to easily roll back and forth and slice them quickly.
- Alternative method (for the impatient): Roll the dough out to approximately 1/4" thick. Use a knife or pizza cutter to slice the dough into 1/2" (or smaller) squares. They might not be as cute or as authentic looking, but it will only take a couple minutes to cut out all of the mints.
- Spread the soft pieces across a baking sheet and allow them to sit at room temperature overnight. You could speed up the process and put them in the refrigerator uncovered. Mine were fine on the counter though. When they have hardened enough to store, transfer the mints to an airtight container. Enjoy!
To Make Chocolate Butter Mints
- Reduce the powdered sugar by the amount of cocoa powder in the recipe. Whisk the cocoa powder into the powdered sugar first, before adding the powdered sugar to the recipe. You can skip this step, but it will take a little longer to combine the cocoa powder into the finished dough.
Notes
Nutrition
{originally published 3/29/13 – recipe notes and photos updated 12/23/17}






Anonymous says
Mary
With the chocolate mints, do you still add the peppermint?
Mary says
Yes, I do.
JoAnn says
How do these compare to the powdered sugar and cream cheese mints. I have made those before, but these sound really yummy. I am having a baby shower for my daughter next Saturday (Oct 26th) and I want to make them a few days in advance 🙂
Mary says
These will be hard mints that dissolve more like powder in your mouth. The cream cheese mints are very soft by comparison. Both are delicious, but very different end results.
Nazma says
May I know the ingredients in metric units pls???
Mary says
Sorry, Nazma. I don't track that information. There are a number of conversion calculators online that should be able to help you with that.
sally m says
Can this dough be pressed into plastic chocolate candy making molds? If so, should they dry first or will they just pop out?
Mary says
I can't think why the dough wouldn't work in a mold. I'd try shaping it and popping it out right away to see if that works. Otherwise, letting it dry should be fine as well.
Bettina Groh says
these sound easy and good but my granddaughter won't touch anything with mint… what can I substitute?
amy garner says
There are a lot of flavors. Try almond, cherry, why not maple, there is a lot of ideas.Go to a place that specializes in candy making supplies or cake making they can tell you. Get adventurous… I can see it in maple stuffed in dates with a walnut half on top! How fun.
amy garner says
I think this sounds awesome.. as a child we made potato candy and it is very similar to this!
renee says
I made these just now. Precisely to the recipe-chocolate. Reduced the sugar because of cocoa. I used dark chocolate. I found them to be extremely crumbly to roll out-wouldn't hold the shape. Humidity factor? I dumped back in mixer bowl and added about another 3-4 T of the milk. MUCH easier!! They're drying now. Taste great!! Dry time may be longer due to increased moisture????
Teresa Shiver says
I think they would be wonderful dipped in dark chocolate
Margie says
Made 3 batches of these, loved them and so did everyone I gave some too
Anonymous says
Came out perfectly. I made mint and cinnamon. Will make again!
Anonymous says
Is there any tips on how to stop them sweating ?
Mary says
If you have them in an airtight container, crack the lid. I live in a very warm part of the country and I find it best to store mine in the refrigerator if they start to sweat. I hope that helps!
Sharon Markey says
Is there a chance I could use vanilla extract and NOT peppermint (if so, how much) or maraschino cherry juice? I would like to make these tomorrow, and need to know.
Mary says
Hi Sharon,
I imagine the candy could work with vanilla. I'd add 1/2 teaspoon, taste the mixture, and add more until it works for you. I have no idea how the cherry juice would work, but you could try using a little bit of the candy mixture, adding a bit of juice and seeing how it tastes.
I've only made these as mints, but it's a simple enough recipe, and it could be fun to play with the different flavors. If you decide to do that, let me know how they turn out!
Good luck!
sally m says
Any problem to add food coloring?
Mary says
Feel free to make these whichever colors you like best, Sally. The food coloring won't affect the way the recipe works.
Melissa French - The More With Less Mom says
I can't get over how easy these are to make. I'm an absolute addict, it might be a bad idea to make more. I included this in my Christmas in July roundup.
Flatbear Northerly says
This recipe looks fabulous. Thanks so much for sharing. I will probably distribute butter mints as Christmas gifts. I've a question, though: could one use a pastry bag with a decorative tip to make candies in pretty shapes? I have seen similar recipes use this method, but this recipe is more complex than I've seen before, so I wanted to make sure my idea could work. I am a total noob at this stuff. 8)
Mary says
This dough is probably much too firm for a pastry bag, at least I assume it is. (I'm not an expert on the "pretty" end of baking and candy making!) We roll it out and just cut it.
Darlene says
Try using a cookie press. Usually, the dough is firmer than you’d use for a tip for a piping bag. Just choose a shape that is all connected, as some of the shapes aren’t. The dough spreads and “connects” them when they are baked.
Darlene says
Oh, and play dough triggered something else. You could use a well-cleaned play dough press, dies and cutters. Just slice them off thinly – maybe 1/8 to 1/4″ thick.
Anonymous says
This was such a fun and yummy treat to make! I was able to make 3 1/2 batches with one can of sweetened condensed milk. The best part was rolling it out and playing with it like play dough. My favorite was black licorice! YUM! Cinnamon was a close second. My mint looks and tastes like a really nice tooth paste! hahaha! I made them 2 tone and they turned out adorable!!! Thank you for a fun and easy recipe.
LBS
Laura says
Thank you for this, I make gift baskets every Christmas for friends and these will be a great addition! I just made them and they were super easy, so easy I was able to make them with my three year old running around. I just made the Mint ones, they have been finished for about 4.5 hours now and I had set them out in our cold season room so they have been chilled. So far, they are still quite soft…do they harden at all? Thank you for the recipe!
Laura
Mary says
Mine usually harden to "click" stage, i.e. drop them on the counter and they click. I'd leave them in the open in the cold room for at least 24 hours. I hope that helps!
Kathy says
Mary, my daughters and I made these and they are amazing!! Definitely will become a significant part of our Christmas candy making tradition! Thanks for the recipe!!
Patricia @ ButterYum says
I adore buttermints. Pinning!
Katrina Kichler says
If these can be frozen how long will they keep? I have a wedding in November and we didn’t want to be going nuts closer to date… A little help please!
Mary says
I’d recommend making a batch now and “test” freezing them for 2-3 months. They should be fine in the freezer for a couple months, but I’d want to make certain of that before the big day.
Tammy says
HI, I’m curious if you tried freezing these and how it turned out.