This post may contain affiliate links. Please read our disclosure policy.
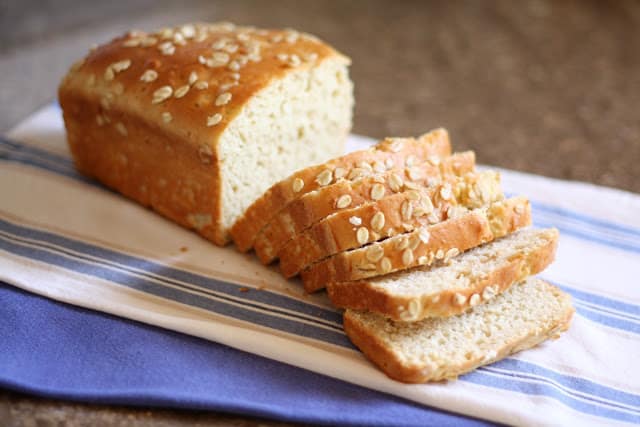
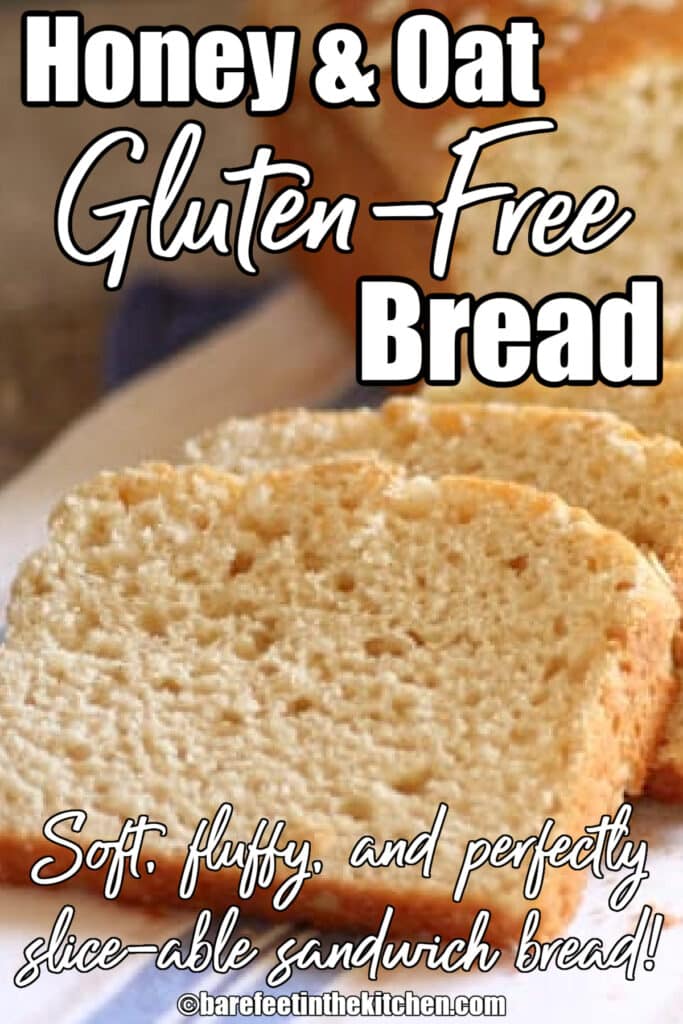
Soft, fluffy, and perfectly sliceable gluten-free sandwich bread with a rich flavor from oat flour and honey.

Gluten Free Oat Bread
After a few months of making and very much enjoying soft and fluffy gluten free sandwich bread, I realized I missed the deeper flavors that are typical in whole wheat sandwich bread.
So, I started playing with that recipe. (The original is closer in flavor to a traditional light wheat or white sandwich bread.)
I love, love,love this bread! It’s a bit time consuming with the 2 rises but the texture and taste are lovely! I bake it in my 1 lb Pullman pan then slice it after cooling and freeze. So much better than any store bought gf bread!
Gluten Free Honey Oat Bread
I’ve made this recipe at least five times now and I am very excited to finally share it. This bread is perfect for sandwiches, toast, or as a snack on its own.
Try a slice toasted slathered with restaurant-style whipped strawberry butter or vanilla bean whipped honey butter.
Add a smear of peach jam or apple butter for a treat that you won’t soon forget.

If you enjoy step-by-step photos, there are a whole lot of photos included with the original Gluten-Free Sandwich Bread post. This dough appears the same in each stage and those photos can be used for reference.
Recipe Tip
When baking this bread, testing for doneness with an internal thermometer is recommended. The internal temperature should be 190-200°F when the loaves are done baking.
I find that a baking time of 25-30 minutes is almost always perfect in my oven with my dark baking pans. HOWEVER, several readers have needed to add an addition 10 – 25 additional minutes to that baking time for their ovens. It’s worth taking a moment or two and reading through some of the comments left on this post along with the hundreds of 5-star ratings.
Baking can be finicky and baking with gluten-free ingredients can be even more so at times. Once you’ve dialed in the perfect baking time for this bread though, it will be the most reliable gluten free bread you can possibly make.
For a few more great gluten-free recipes to try, check out these Gluten Free Flour Tortillas, the Sour Cream Banana Bread, this Hershey’s Chocolate Cake, and the Best Gluten-Free White Cake.
This Homemade Nut and Seed Paleo Bread from Cotter Crunch looks like a terrific option for toast too.
If you are not in need of Gluten-Free recipes, check out a few of our favorite whole wheat bread recipes:

Honey and Oat Gluten Free Bread
Ingredients
- 1 cup brown rice flour
- 1¼ cups oat flour make sure the flour is certified GF
- ⅔ cup potato starch
- ⅓ cup tapioca starch
- 2 teaspoons instant yeast
- 1¼ teaspoons kosher salt
- 1¼ teaspoons xanthan gum
- ¾ cup warm milk
- ⅓ cup honey
- ¼ cup soft butter
- 3 large eggs
- Optional: sprinkle of oats for the top make sure the oats are certified GF
Instructions
- Place the flours, starch, yeast, salt and xanthan gum in a mixing bowl, or the bowl of your stand mixer. Warm the butter and honey in a glass bowl or cup until the butter is melted. Whisk or stir it together and set aside.
- Using an electric mixer (hand mixer, or stand), gradually beat the warm milk into the dry ingredients. The mixture will be crumbly at first, but once all the milk is added, it’ll come together. Add the melted butter and honey to the mixing bowl and beat until thoroughly blended.
- Add the eggs, one at a time. Beat the mixture till each egg is thoroughly integrated before adding the next one. Once you’ve added all the eggs, beat the mixture at high speed for 3 minutes. This adds air to the thick batter, which helps take the place of the missing gluten as far as structure is concerned.
- At the end of 3 minutes, the batter will look like thick, heavy buttercream icing: smooth and silky. The dough will also be very sticky, and feel a bit gritty if you rub some between your fingers. Leave the batter right in the mixing bowl and cover the bowl with a light cloth or plastic wrap.
- Let the thick batter rise for 60-90 minutes. This batter won’t double in size, but it’ll definitely puff up. Gently stir the batter down. Scrape it into a lightly greased 8 1/2” x 4 1/2” loaf pan.
- Use your wet fingers, or a wet spatula or bowl scraper, to smooth the top, eliminating any “wrinkles.” The smoother your loaf is before you put it into the oven, the smoother it’ll be once it’s baked.
- Lightly sprinkle the top of the loaf with oats and press lightly into the loaf. Loosely cover the pan and let the dough rise till it barely crowns over the rim of the pan. 45 – 60 minutes, as much as 90. Towards the end of the rising time, preheat the oven to 350°F.
- Bake the bread for 25 minutes, until golden brown. Remove it from the oven, and turn it out of the pan onto a rack. Lightly brush with melted butter to help keep the crust soft, being careful not to brush off the sprinkling of oats. Slice when completely cool. Enjoy!
{originally published 10/16/12 – recipe notes and photos updated 4/15/22}


Hey, i was wondering, could i sub the mix of different flours fro a gluten free measure for measure flour or would that not work? thank you!
Bread recipes are notoriously finicky, but if you’ve had success subbing that way in the past, it may work for you. I can’t speak for certain though, as I’ve never tested it with those specifically.
Hello.
Do you have weight measurements for this recipe?
If not, what is the preferred method for measuring the flours? Spoon and level or scoop?
Thanks!
I spoon and level the flour, Stephanie.
I always make this bread…it’s the best! I don’t miss gluten breads with this recipe.
I’m so glad you are enjoying the bread!
This bread is great tasting. I did have an issue with the baking time in the recipe. The recipe states bake at 350 degrees for 25 minutes until golden brown. I use an oven thermometer and my oven was definitely at 350 degrees when the bread was placed in my oven. At 25 minutes, the bread was golden brown but when I inserted my digital thermometer, the reading was 101 degrees & had a wet interior removing the thermometer. I bake a lot of GF Bread so based on my experience, breads are done with an internal temperature of 190-200 degrees F. I’ve never made a bread recipe that called for less than 45 minute bake time and usually it’s 50-60 minutes. So I baked this bread a total of 50 minutes. My digital thermometer read 180 degrees F. This is a batter bread and my experience with batter bread is it will collapse if undercooked. Maybe you can shed some light on the cook time for me. Thank you a delicious recipe. Very tasty toasted.
It’s the weirdest thing with this bread, but mine is consistently done between 25-30 minutes. HOWEVER, several readers have done as you do and tested it with the thermometer and needed as much as 20 more minutes. I honestly don’t know if it’s the pan or the size of the loaves or exactly what is happening here. I will add a note to the post regarding testing for temperature. I am SO glad that you knew to test it this way and that it turned out so well for you. It really is an excellent bread recipe, but the baking time is honestly confusing to me as well!
Are you making a single loaf? In a standard 4×8 inch pan? Are you by chance doubling the recipe or changing anything else here? Based on the fact it turned out well for you, I’m assuming you followed ingredients and directions as written. Thanks for sharing your feedback, Janie!
Mary, I followed the recipe as written exactly. I used my Lodge Cast Iron 4 x 8 pan…..only one I use for bread.
I’m glad you like the bread!
I love this bread & want to pass it on to my granddaughter. She can’t have milk or butter. Can she sub almond milk & dairy free butter ?
Thank you
Yes, that will work.