This post may contain affiliate links. Please read our disclosure policy.
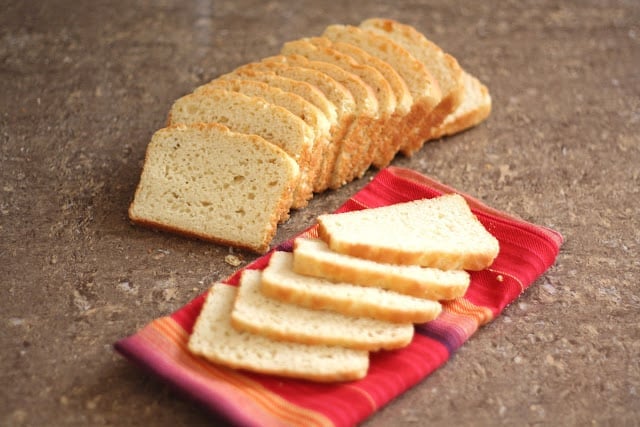
This is a soft and fluffy gluten free sandwich bread that tastes great and can be sliced incredibly thin.
I have never sliced a loaf of homemade bread this thinly. I average about 2-3 slices for every inch of this bread. An 8 1/2″ loaf pan usually results in about 20 slices.
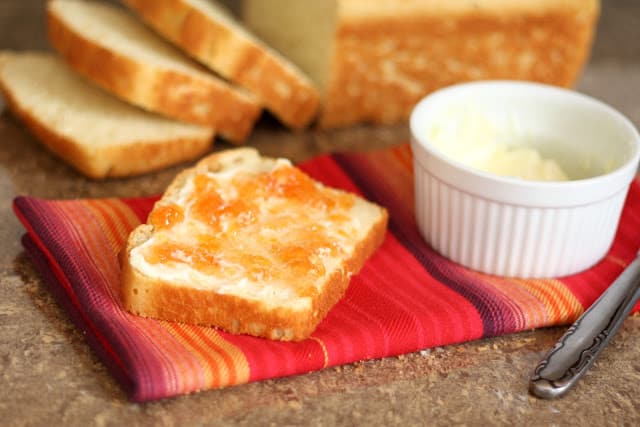
Sliced thick and thin, we’ve been eating this bread with breakfast, lunch, dinner or even as dessert a few times. With homemade peach jam, it is a treat that the whole family enjoys.
Gluten Free Sandwich Bread
I’ve played with this recipe for a while now and it produces a very dependable loaf of bread. Two things to note here: first, measure the ingredients carefully.
Scoop the flours into the measuring cups with a spoon and then level off the flour with the back of a knife. Also, when pouring the dough into the pan for the final rise, make sure to press down enough to remove any air bubbles.

Trapped air bubbles = a hole in the center of the bread. The air pocket won’t cause it to bake differently and it won’t affect the taste, but it will make for an odd sandwich.
This method is proven and I am beyond thrilled with the results. I’m including a lot more pictures than usual with this post because I have had numerous questions about this bread.
This is a bread recipe that anyone should be able to bake. The pictures will hopefully help provide visuals that a novice can follow.
Gluten Free Bread Recipes
Honey and Oat Gluten Free Bread is a favorite in my house for morning toast and for sandwiches as well.
For a couple of quick bread options, this Sour Cream Banana Bread and these Chocolate Chip Pumpkin Muffins get made on repeat.
Gluten Free Sandwich Bread Recipe
Once you’ve added all the ingredients, beat the mixture at high speed for 3 minutes.
This adds air to the thick batter, which helps take the place of the missing gluten as far as structure is concerned. It will create a much fluffier loaf of bread, similar to store-bought varieties.
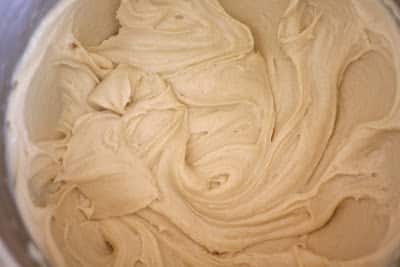
At the end of 3 minutes, the batter will look like thick, heavy buttercream icing: smooth and silky. It should not look at all like a typical yeast dough.
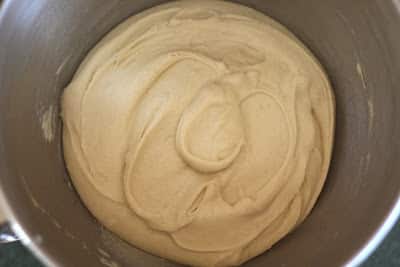
The dough will be very sticky, and feel a bit gritty if you rub some between your fingers. Scrape the sides of the mixing bowl and leave the batter right in the bowl to rise for the first time.
Cover the bowl with a light towel or loose plastic wrap and let the thick batter rise for 90 minutes. This batter might not completely double in size, but it will puff up considerably.
Lightly grease an 8 1/2” x 4 1/2” loaf pan with butter. Gently stir the batter down. Scrape it into the prepared pan. The dough should still be wet and not at all knead-able. It reminds me of a very thick brownie batter at this stage.
Using dampened fingers, or a wet spatula or bowl scraper; smooth the top, eliminating as many wrinkles, bubbles or creases as possible. The smoother your loaf is before this final rise, the smoother it will be once it’s baked.
After the dough rises and bakes, the top of the loaf will look very much the same as it looks when you finish smoothing it out. It is worth a minute or two of effort to make it as smooth as possible now.

Loosely cover the pan with a towel (or a lightly greased piece of plastic wrap) and let the dough rise until it barely crowns over the rim of the pan.
This will take 45 – 60 minutes, or possibly as much as 90 minutes, depending on the temperature of your kitchen. Towards the end of the rising time, preheat the oven to 350°F.
This dough is fairly delicate. Try not to touch it again at all. Any finger touch or bump will be visible after the bread is baked.
Kitchen Tip: I use this mixer, this scraper, and this loaf pan to make this recipe.

Tender High Rising Gluten Free Sandwich Bread
Ingredients
- 2 cups brown rice flour
- ⅔ cup potato starch this is NOT the same as potato flour
- ⅓ cup tapioca starch
- 3 tablespoons sugar
- 2 teaspoons instant yeast
- 1¼ teaspoons kosher salt
- 1¼ teaspoons xanthan gum
- 1 cup warm milk
- ¼ cup butter softened to room temperature
- 3 large eggs
Instructions
- Combine all of the dry ingredients in a mixing bowl, or the bowl of your stand mixer. I’ve made this using both the KitchenAid and a hand mixer. Both methods work well, admittedly the stand mixer is much easier.
- While using an electric mixer (hand mixer, or stand), slowly pour in the warm milk. The mixture will be mostly crumbs at first, but once all the milk is added, it will begin to come together. Add 4 tablespoons of softened butter and beat until thoroughly blended.
- Add the eggs, one at a time. Beat the mixture after each egg is added, until it is thoroughly integrated before adding the next one. Once you’ve added all the eggs, beat the mixture at high speed for 3 minutes. This adds air to the thick batter, which helps take the place of the missing gluten as far as structure is concerned. It will create a much fluffier loaf of bread, similar to store bought varieties.
- At the end of 3 minutes, the batter will look like thick, heavy buttercream icing: smooth and silky. It should not look at all like a typical yeast dough. The dough will be very sticky, and feel a bit gritty if you rub some between your fingers. Scrape the sides of the mixing bowl and leave the batter right in the bowl to rise for the first time.
- Cover the bowl with a light towel or loose plastic wrap and let the thick batter rise for 90 minutes. This batter might not completely double in size, but it will puff up considerably.
- Lightly grease a 8 1/2” x 4 1/2” loaf pan with butter. Gently stir the batter down. Scrape it into the prepared pan. The dough should still be wet and not at all knead-able. It reminds me of a very thick brownie batter at this stage. Using dampened fingers, or a wet spatula or bowl scraper; smooth the top, eliminating as many wrinkles, bubbles or creases as possible. The smoother your loaf is before this final rise, the smoother it will be once it’s baked. After the dough rises and bakes, the top of the loaf will look very much the same as it looks when you finish smoothing it out. It is worth a minute or two of effort to make it as smooth as possible now.
- Loosely cover the pan with a towel (or a lightly greased piece of plastic wrap) and let the dough rise until it barely crowns over the rim of the pan. This will take 45 – 60 minutes, or possibly as much as 90 minutes, depending on the temperature of your kitchen. Towards the end of the rising time, preheat the oven to 350°F.
- This dough is fairly delicate. Try not to touch it again at all. Any finger touch or bump will be visible after the bread is baked.
- Bake the bread for 25 minutes, until golden brown. Remove it from the oven, and using hotpads for both hands, immediately turn it out of the pan onto a rack. Brush with a very small amount of melted butter to help keep the crust soft, and add flavor. Slice when completely cool. Enjoy!


Curious- why 2 rises? there is no gluten to develop, the gf structure is kinda fragile. Could this be baked with only one rise?
I have made this bread countless times and the double rise is my preference.
Hi! Hopefully there are no stupid questions here. I am a first time gf bread maker, about to attempt this recipe tomorrow. I plan to use my KitchenAid stand mixer. Which attachment should I use to mix the dough ingredients together? The whisk, the white paddle beater, or the bread hook? Second question, what does it mean to “stir down the dough” after the first rise in the mixing bowl? Do I use a spoon to literally stir the dough? Or is it more like folding? Thank you so much in advance! I really hope this turns out.
There are never stupid questions, Lorin. And gluten free baking typically leads to a LOT of questions. This is different from most traditional bread making. You can use the regular white paddle beater to mix the dough for this bread. It’s going to look like the photo and not resemble a typical bread dough at all.
To stir it down, is literally that, you aren’t going to beat it again. Just use a spatula or a large spoon to kind of gently stir it out of the bowl and scrape it into the greased pan. It will be a thick batter consistency at this point. I hope that helps!