This post may contain affiliate links. Please read our disclosure policy.
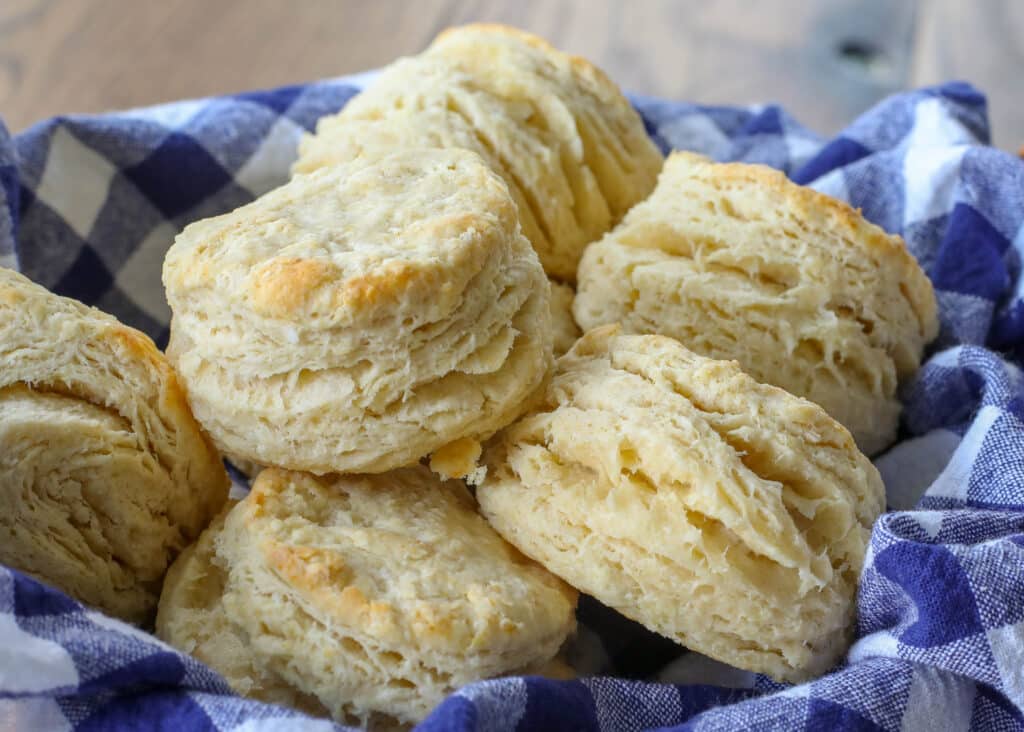
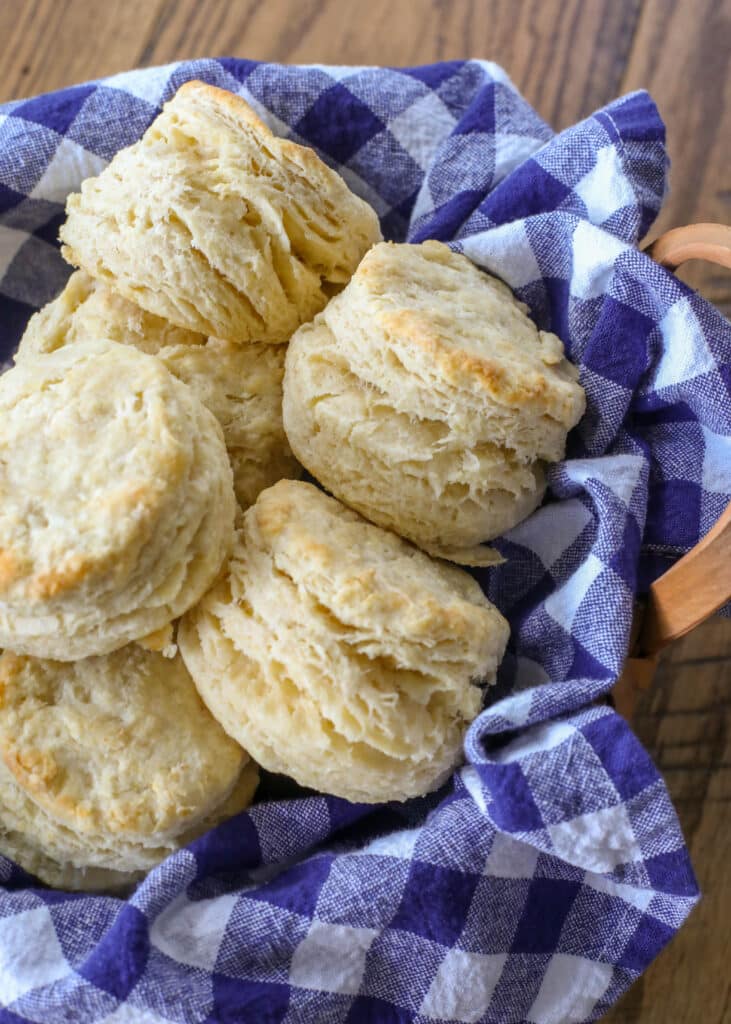
Fluffy Biscuits with plenty of buttery layers are possible with just a few helpful tips and about ten minutes of hands-on effort.
I have included a whole lot of photos with this recipe to illustrate the steps below and show you how simple it can be to make perfectly fully homemade biscuits.
I’m telling a bit of a story today, so feel free to hit that “Jump To Recipe” button at the top of the page if you’re uninterested in my biscuit-making lesson.
22 years ago, I was a newlywed when I made my first batch of biscuits. They will never be forgotten.
I was feeling domestic and happy as I kneaded and kneaded and kneaded the dough. I quite literally kneaded that dough for at least 30 minutes.
Little did I know that I was absolutely killing those biscuits. While they baked, I noticed that they weren’t really rising, but I figured that I’d just made them thinner than I should have.
Ha! Little did I know at the time. The biscuits were inedible.
My sweet husband attempted to eat them, but oh my. They were horrid. We declared them hockey pucks and I was scared away from biscuit making for a couple years following that attempt.
When I finally decided to attempt making biscuits again, I was thrilled to find a recipe that worked reliably after a few more failed attempts.
Fluffy Biscuits
I’ve now been making this biscuit recipe for over 20 years and they are fluffy, delicious, melt in your mouth awesomeness. They are versatile enough to use for biscuits and gravy or with butter and peach jam.
These days, I make this recipe with real butter and I love these biscuits even more than the original. (The original recipe I’ve adapted this from was made with shortening. While those were delicious, I don’t hesitate to tell you these are even better.)
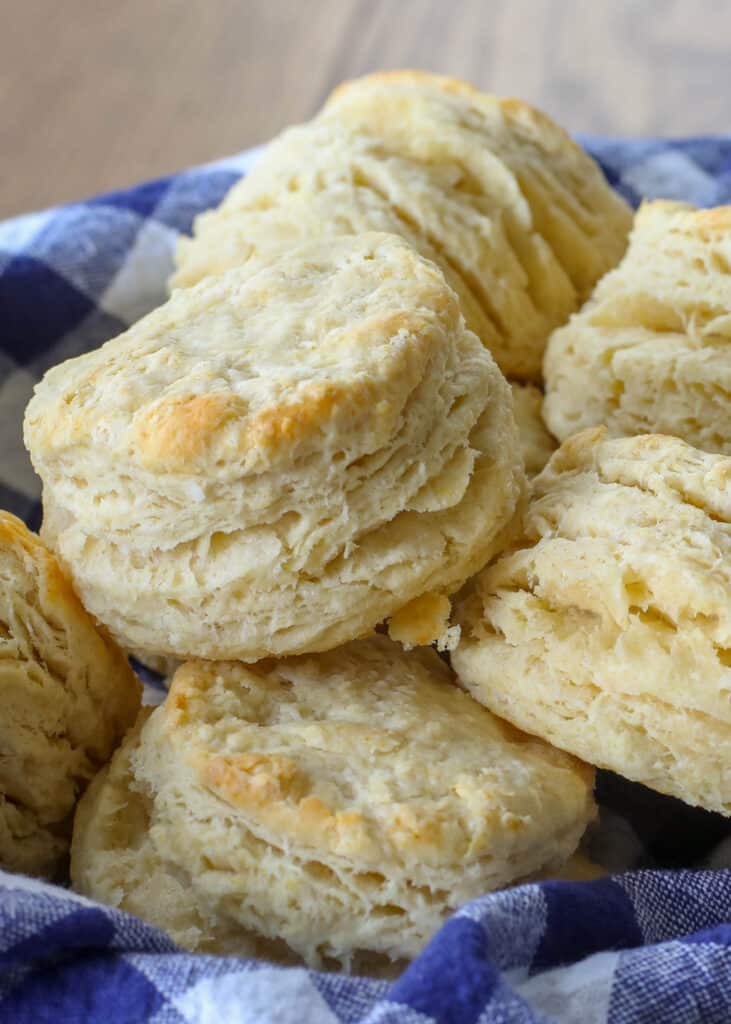
The butter flavor in these biscuits comes through beautifully. They rise light and fluffy while remaining melt in your mouth tender with all those pretty layers.
These biscuits, they are perfection. I shared this recipe here on the website just a few weeks after I started this blog so many years ago.
It was way past time for a photo update and I’m excited to share the recipe with you again today – complete with step-by-step directions and photos to go with each step.
And I’m including this very old video of my five year old making a batch of biscuits – because this will never ever fail to make me grin.
Flaky Biscuit Recipe
Want to know the secret to making all those buttery layers in your biscuits? It’s surprisingly easy – once you stop kneading the ever-loving daylights out of the dough. Or take the ultimate shortcut and make Easy Drop Biscuits.
Fold the dough. That’s it. Read through the steps and photos below and you’ll see what I am talking about. You absolutely don’t need to beat the heck out of the biscuit dough.
Basically, just smush it together until it holds together and then fold it over on itself several times. That’s all there is to it.
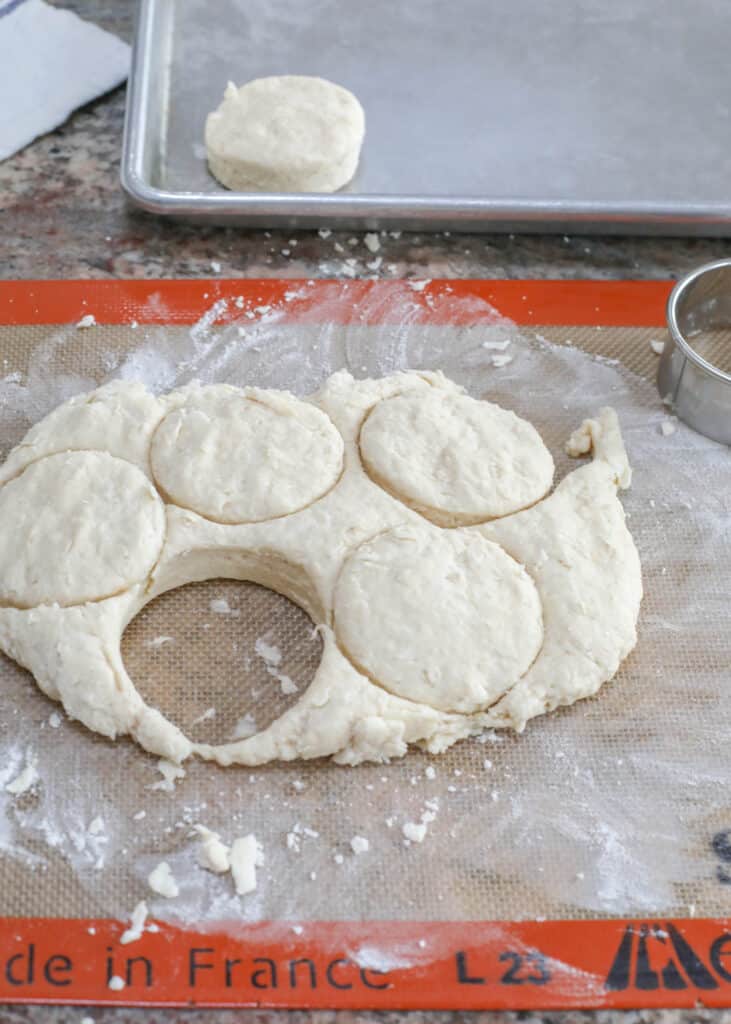
Do not twist the biscuit cutter! Press straight down and pull straight back up after cutting the biscuits.
If you twist the cutter, you’ll seal the edges of the biscuits and they won’t rise nearly so high.
Bonus tip, if you find that your biscuits are rising tall and starting to fall over, pressing a light thumbprint into the top of the biscuit prior to baking can help prevent that.
How To Make Fluffy Homemade Biscuits
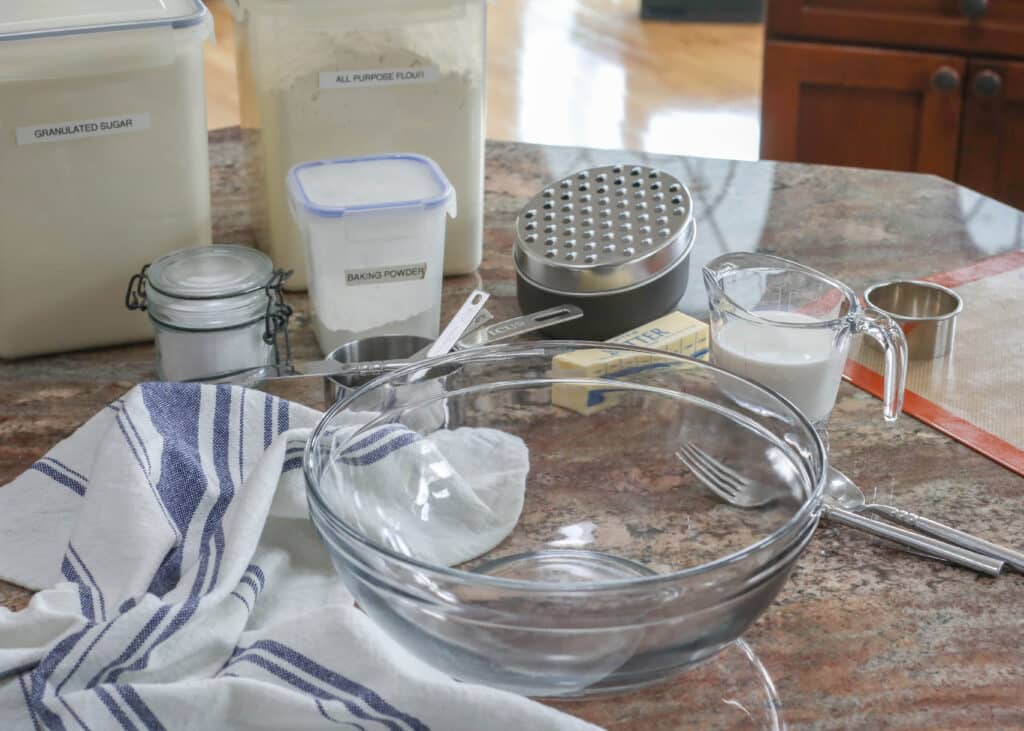
Preheat oven to 425 degrees. In a mixing bowl, stir together the flour, baking powder, salt, and sugar.
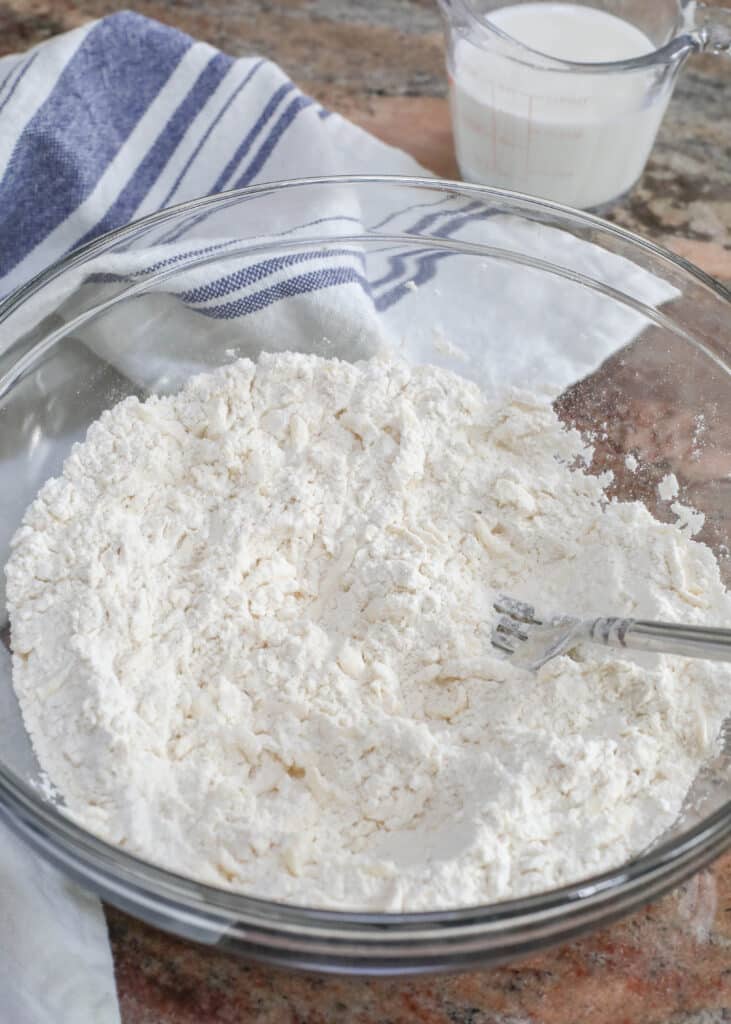
Grate the butter and dump it into the bowl with the dry ingredients.
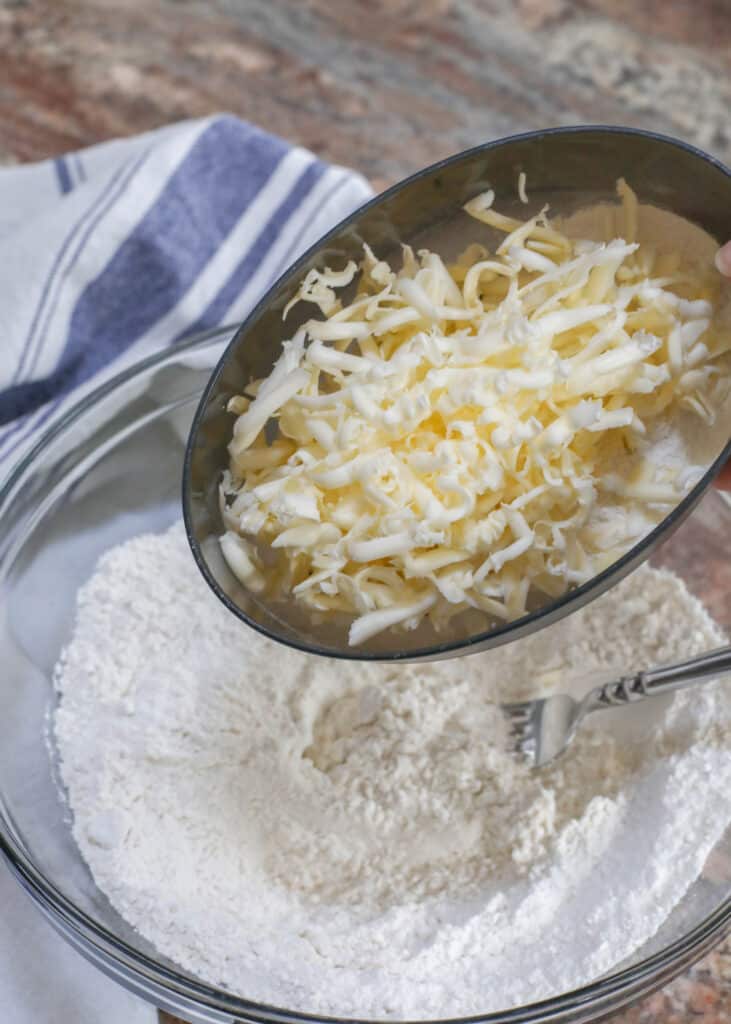
Use a fork (or pastry blender, if you prefer that) to cut in the cold butter pieces until the mixture resembles a coarse meal with little pea size or smaller lumps throughout.
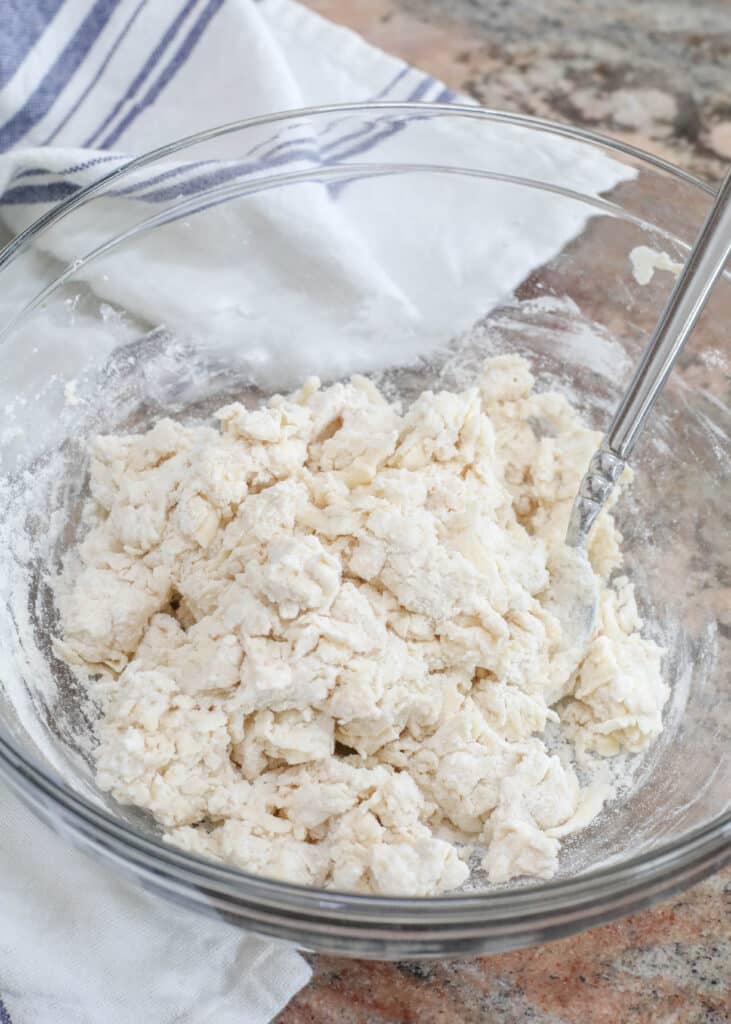
Gradually stir in milk – seriously, don’t dump all the milk in at once!
Add just enough milk until the dough pulls away from the side of the bowl. It should still look very dry.
Turn the dough out onto a floured surface. I like to use a silicone mat that has been lightly floured. It makes for very easy clean up.
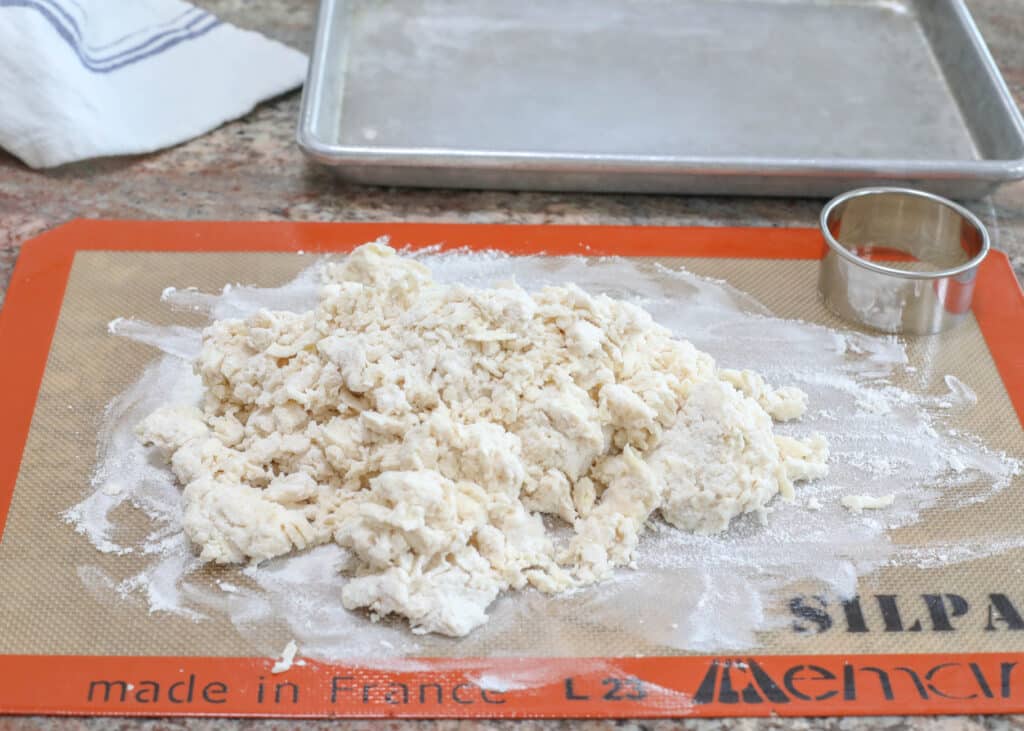
Knead just a few times, folding the dough over onto itself to create those flaky layers. This isn’t the same as kneading bread dough.
Seriously, just trust me on this – knead the dough no more than 15-20 times MAX, learn from me here. Once the dough has “smushed” together, fold it over on itself a few times to finish “kneading it.”

Pat the dough out to about 1 inch thick. Cut into circles with a biscuit cutter or round cookie cutter.
Repeat until all the dough is used. Press any remaining pieces together (don’t knead again) and cut biscuits again.
Place the biscuits on a baking sheet or in a baking pan. It’s okay if the edges touch.
Bake for 14-16 minutes in the preheated oven, until the edges begin to brown.
Mom Sanity Tip
I spent a lot of years cooking with little ones underfoot. If you want to enjoy a few moments of peace and quiet, give the kids a few extra edge pieces of dough to play with at the table.
Just be sure to discreetly toss that particular dough ball in the trash when it is time to put everything on the baking sheet. If your kids are a little older and paying attention, let them bake it for themselves.
I made impromptu biscuits for many meals over the years, just to give the toddlers something to occupy themselves with during that half hour before dinner.

Fluffy Biscuits
Ingredients
- 2 cups all-purpose flour
- 2 1/2 teaspoons baking powder
- 1 teaspoon kosher salt
- 1 tablespoon sugar
- 1/3 cup cold butter, grated
- 3/4 cup milk, plus 1-2 tablespoons only as needed
Instructions
- Preheat oven to 425 degrees. In a mixing bowl, stir together the flour, baking powder, salt, and sugar. Grate the butter and dump it into the bowl with the dry ingredients.
- Use a fork (or pastry blender, if you prefer that) to cut in the cold butter pieces until the mixture resembles a coarse meal with little pea size or smaller lumps throughout.
- Gradually stir in milk – seriously, don't dump all the milk in at once! Add just enough milk until the dough pulls away from the side of the bowl. It should still look very dry.
- Turn the dough out onto a floured surface. I like to use a silicone mat that has been lightly floured. Knead just a few times by folding the dough over onto itself. (Seriously, just trust me on this – knead the dough no more than 15-20 times MAX, learn from me here).
- Pat the dough out to about 1 inch thick. Cut into circles. Repeat until all the dough is used. Press any remaining pieces together (don't knead again) and cut biscuits again.
- Place the biscuits on a baking sheet or in a baking pan. It's okay if the edges touch. Bake for 14-16 minutes in the preheated oven, until the edges begin to brown.
Video
Nutrition
Nutrition information is automatically calculated, so should only be used as an approximation.
{originally published 6/15/11 – recipe notes and photos updated 10/2/20}


Thank you for this recipe–it turned out perfectly. Your note about using the cutter only straight up and down was a game changer for me! Thick, fluffy biscuits–just as you said–full of flavor. My husband is so happy–and I am too.
I’m thrilled that they turned out so well for you, Deb!
Excellent taste and composition. Your directions were right on!
Thanks, Pamela. Happy baking, and enjoy the biscuits!
Ez to make turned out perfect so delish
I’m thrilled that you’re enjoying the biscuits!
Do you have to make any recipe adjustments for altitude above 5000 feet
I typically do not adjust this recipe when traveling at higher altitude, but I’m also not an expert on high altitude baking. They’ve turned out fine both ways.
My husband is a biscuit and gravy LOVER. And I most definitely mean LOVE VER. He’s always said he married me because I made homemade biscuits, pastries and bread’s for him. So of course I’m always looking for new recipes to make him. I just so happened across this particular one and of course as always I tend to tweek most recipes while making. I added a little more butter and baking powder and these are some of the “VERY BEST BISCUITS EITHER OF US” have “EVER HAD”!! SIMPLY FFFAAAABBBBBUUUUULLLLLUUUUUSSSS!! 🫶🫶🫶💯💯💯👍👍👍👍💚💚💚💚💚
Awe! That’s awesome, Tori. I’m glad the biscuits were such a hit!
I made these twice now… I love them…so yummy 😋. I brown butter in the pan (place in oven while preheating.) Then place biscuits in the brown buttered pan. Oh my goodness…game changer.
mmmmm I bet they’re delicious with the browned butter too!
can these biscuits be “drop biscuits’?
Hi Patricia, for drop biscuits, I use this recipe: https://barefeetinthekitchen.com/easy-drop-biscuits/
YES! YES! YES! I have made the same mistake! Kneading the dough like it’s an exorcism! And YES! I too was wondering why some would rise and some wouldn’t…(ahem! the twist… ). You have made me a believer in miracles! …I am adoptable 😉
bwahahahahaha I love that you relate!
I learned to make biscuits in a bowl with a “well” pressed in the middle of the flour. I was looking for a lighter fluffier biscuit. ijust took them out of the oven. OMGosh, love them! I baked 15 minutes, buttered the tops and baked 2 more minutes. They are delish!!!
YAY! I’m so glad you like them!
Can leftovers be frozen? I doubt there will be leftovers, but I’m going to double the recipe
Yes! Biscuits freeze beautifully. Just wrap them up tightly and they’ll freeze well for a couple of months.
Hi Mary:
I tried your recipe, and I found the biscuits to be wonderful, but I must have done something wrong, for they were a bit damp inside. I baked them for 15 mins.
I placed them back into the oven. for about 5 minutes more. They seem to be growing up more; maybe I should have placed them in for about twenty minutes instead.
I just took them out; they seem to be more done, because I put them back into the oven.
Also, I’m not big on baking; I usually mess up the recipe, but this time I learned how to adjust the minutes.
I’m going to try them now, they have been sitting for awhile now.
I needed to place them a little longer.
I’m in California, but in the dishpan (center) of the mountain area.
This could be the reason that they didn’t come out completely done.
They are looking great though.
Hi Mary!
I let the biscuits bake in the oven a little longer than you said, because they weren’t getting done. The biscuits melted in my mouth! They are wonderful after I corrected the minutes. Should I adjust the 425 to 450 instead? Or did I get the oven temp wrong?
I made another batch, but I don’t think I placed enough baking powder in the mix. Because they really rise as I thought they would.
But anyway, I put chicken broth in the mix instead of milk this time.
My Service Dog was sniffing the air! I let him check out the biscuits, and he turned his nose up at this biscuit.
I’m sure they will like them this time because they have a hint of chicken them .
Love the recipe!
Thank you
Sincerely
Barbara.
I’m glad the biscuits turned out well for you, Barbara!
Hi Mary!
I just checked my biscuits, and they are rising because I put more baking powder in them… I don’t think I placed enough baking powder the last time.
I’ll let you know how they taste! if they come out like the first batch, I will be even more thankful for I’m a terrible baker!
Sincerely:
Barbara.
Thank you!
I’m glad you were able to figure it out and enjoy the biscuits, Barbara.
Worse recipe ever, I followed all direction carefully and the biscuits were super dry, never rose, don’t waste your time.
Hi Sonia, how did you measure your flour? And the milk? Did you add it gradually? Did you grate the butter as described? How long did you knead the biscuits? folding just barely? How old was your baking powder? Typically the only reasons that biscuits won’t rise are expired baking powder, warm butter that melts too fast, or overworking the dough, which develops gluten and prevents expansion or rising. It’s hard to guess what went wrong without being in your kitchen with you. Did you substitute any of the ingredients here?
I have been looking for a light flaky biscuit recipe forever and this is absolutely the most perfect one! I worked in food service for 43 years and none are as good as this! My husband and I loved them so much, I’m making them for our family campout breakfast for around 50 people. Thank you for sharing!
YAY! This makes me so happy. I’m thrilled that you love the biscuits so much, Kathy.