This post may contain affiliate links. Please read our disclosure policy.
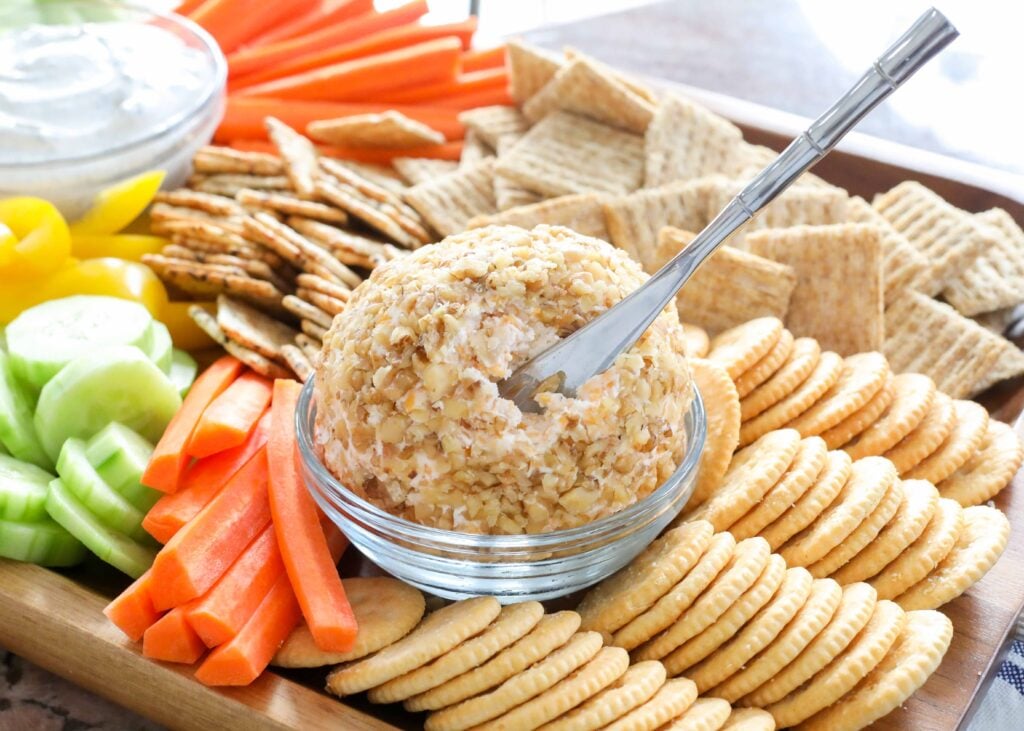
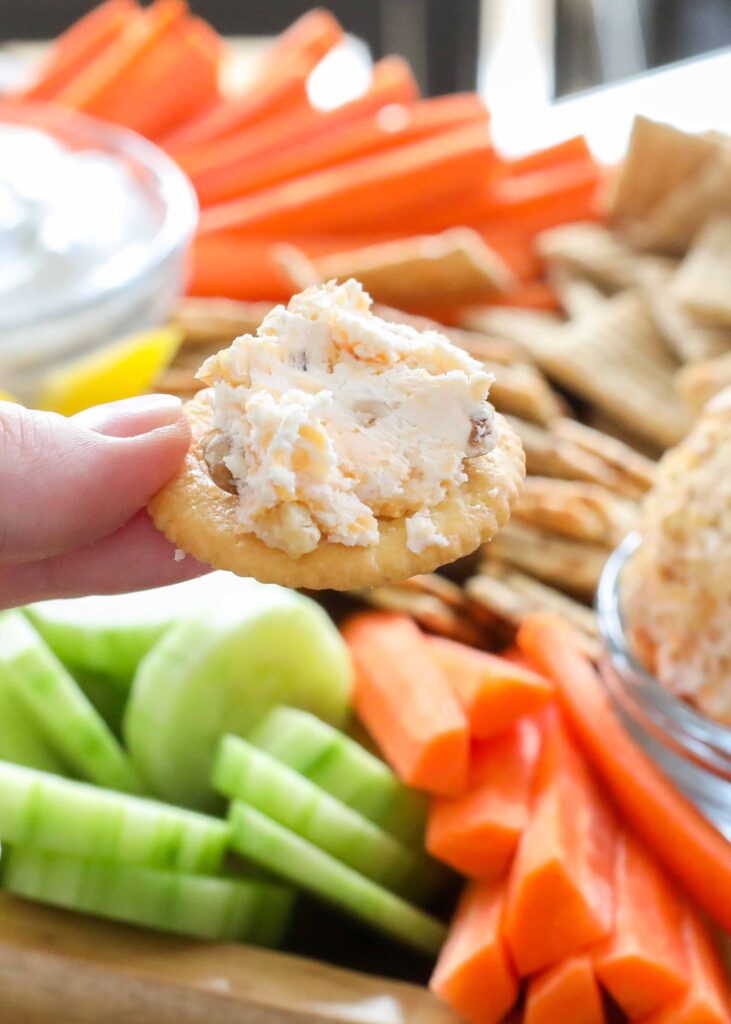
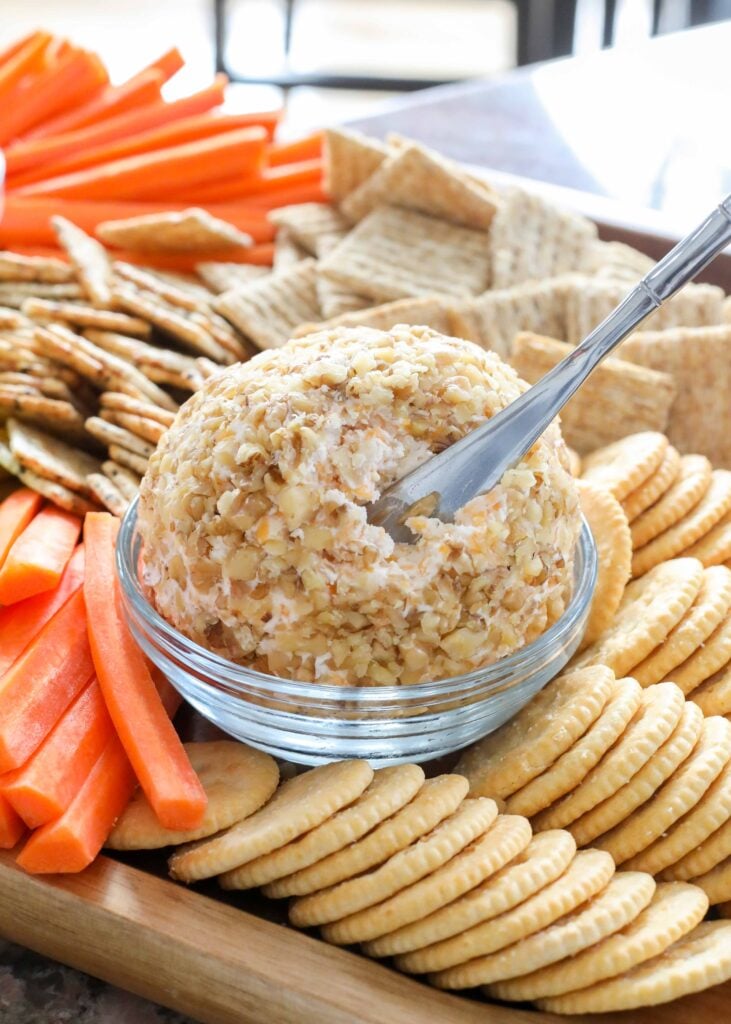
This classic Cheddar Cheese Ball is the snack everyone reaches for first at get-togethers and game nights. Creamy, sharp, and rolled in chopped nuts, it’s a homemade winner that puts every store-bought version to shame.
If you’ve been hanging out here with me for long, you know I’m always on the hunt for no muss, no fuss snack recipes that feeds a crowd of hungry people. This cheddar cheese ball recipe is one of those. It pairs naturally with our everything bagel cheese ball when I’m putting together a spread for company, and between the two of them I rarely have leftovers to put away at the end of the night.
Aunt Judy’s Cheddar Cheese Ball

While I was visiting my Aunt Judy and Uncle Clarence a handful of years ago, she made this very simple cheese ball. And, I may have eaten an embarrassing amount of it. It’s SO good.
As always, when I asked how she made it, she was happy to share her recipe with me. So, now I get to share the deliciousness with you!
In case you missed it, my aunt has gifted me with some of my favorite recipes, responsible for the ever-popular almond bars, strawberry pretzel salad, and ramen noodle salad. She’s also the inspiration for my creamy pasta salad. (There aren’t many things that can beat a recipe from Aunt Judy.) So when I tell you that her cheeseball is fabulous, you can take that to the bank.
Ingredients and Substitutions
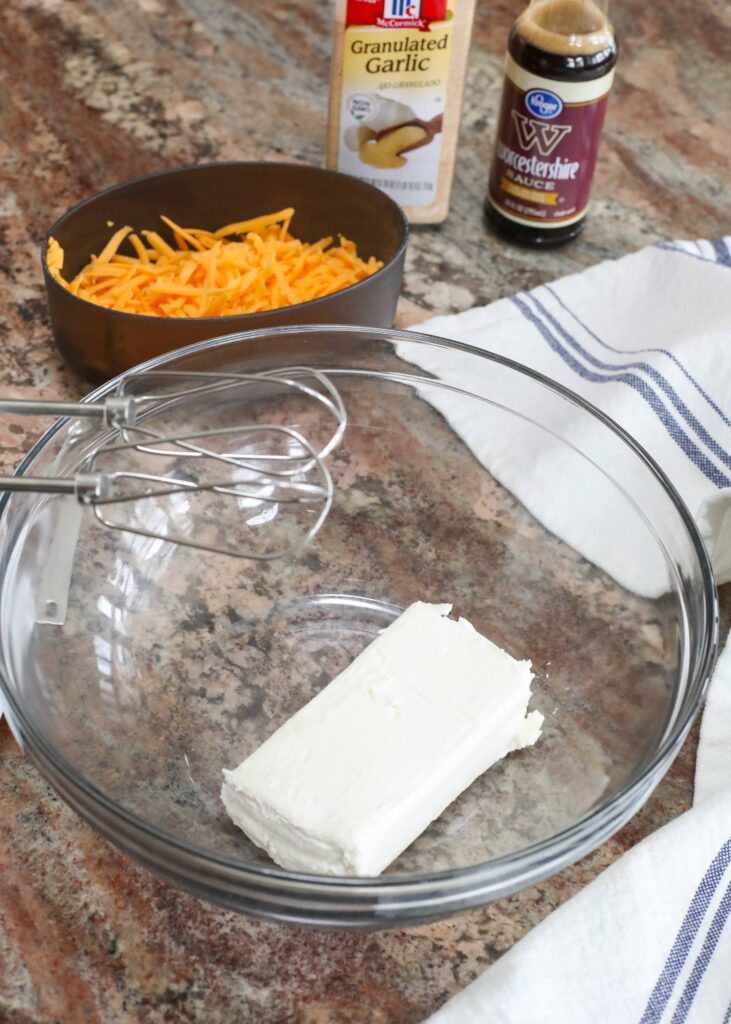
The Cheeses – Regular Philadelphia-style cream cheese is what you want here. I skip the whipped or spreadable tubs. For the cheddar, freshly grate it yourself off a block. The pre-shredded bagged cheese won’t work as well.
Sharpness – I reach for sharp cheddar nine times out of ten. However, mild or medium cheddar will work if it’s what you have on hand.
Seasonings – Garlic powder and Worcestershire are the only seasonings you need. I adore how they make the cheddar taste more cheddar-y, without introducing other flavors.
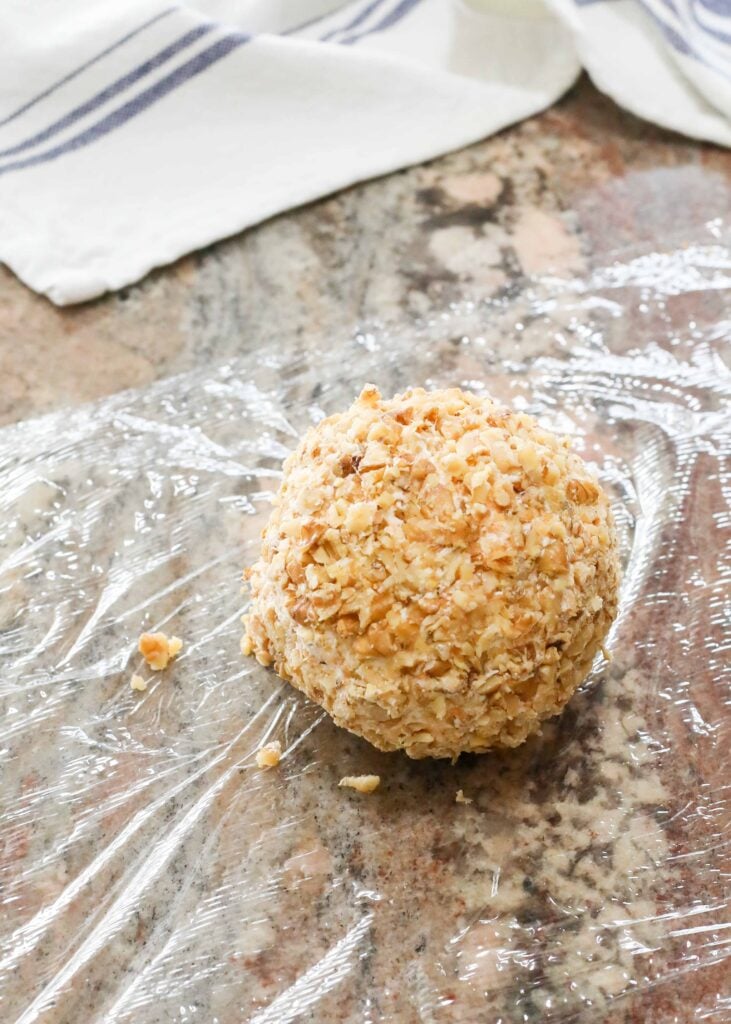
The Coating – You’re going to want to use chopped walnuts (my preference) or pecans, or a mixture of the two. The nuts make the cheese ball tidier to handle, prettier on the platter, and taste better, too.
Notes on Equipment
- Rotary grater – I bought this rotary grater last year and it’s been a dream to work with. It chews through cheese, fruits, vegetables, and nuts with ease. For grating the cheddar block fresh, it’s a small upgrade that pays off every time.
- Electric hand mixer or stand mixer
- Large mixing bowl
- GIR Spoonula – One of my favorite kitchen tools that I use pretty much every day. It combines the best parts of a spatula and a spoon in one handy tool. Nothing sticks to it and it’s completely dishwasher safe. Perfect for scraping every last bit of cheese mixture off the sides of the bowl.
- Small cutting board and a chef’s knife (for the nuts)
How to Make a Cheddar Cheese Ball
Beating the Cream Cheese: Drop the softened cream cheese into a large mixing bowl and beat it on high with an electric hand mixer until smooth and creamy. About a minute does it.
Adding Seasonings: Scrape down the sides of the bowl with a spatula. Sprinkle the garlic powder over the cream cheese and pour in the Worcestershire sauce. I beat it again for about a minute, just until everything looks evenly mixed.
Mixing in Cheddar: Grate the cheddar into the bowl and beat it just until the cheese is evenly distributed. You don’t need to keep going past that point.
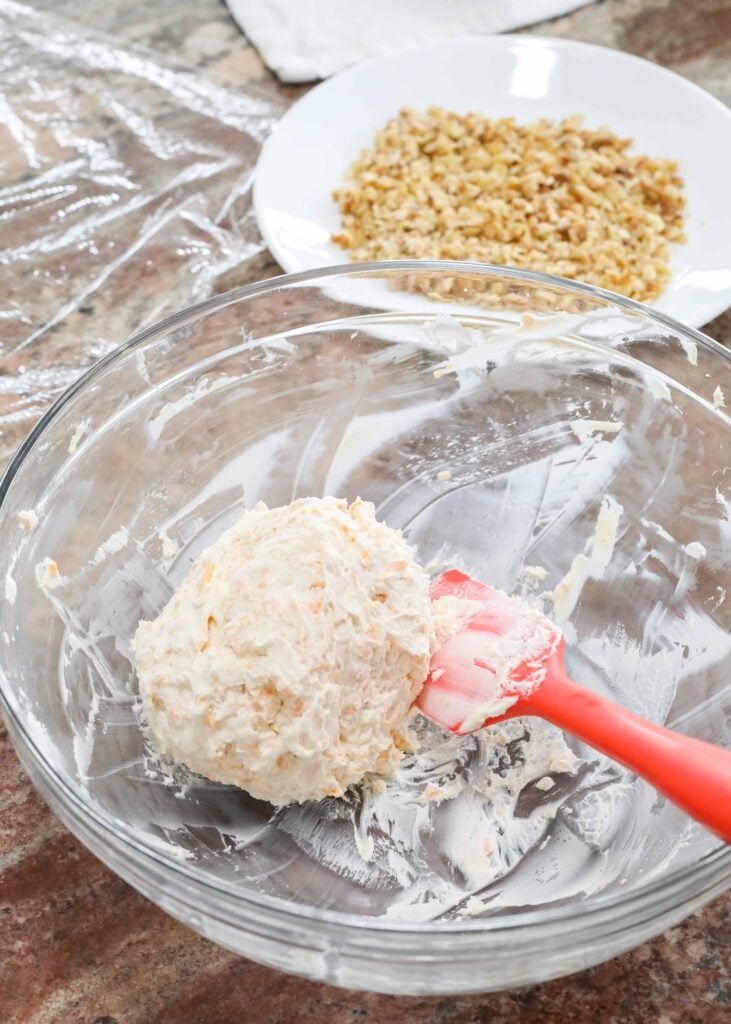
Forming the Ball: I lay a piece of plastic wrap on the counter and pile the cheese mixture into the center of it. Then you just have to draw the edges of the plastic wrap up around the mixture and use them to shape it into a ball. Working through the plastic keeps your hands clean and gives you a nice even shape.
Chilling: Wrap the cheese ball tightly in the plastic and refrigerate it for at least two hours. You can serve it sooner if you have to, but I try to give it a couple of hours in the fridge to let the flavors really come together.
Coating with Nuts: Pour the chopped walnuts or pecans onto a small plate. Unwrap the chilled ball, and gently roll it across the nuts so they coat it on all sides. Press lightly with your hands wherever the nuts don’t want to stick.
Serving: Pull the cheese ball out of the fridge about 30 minutes before you want to serve it, so that it came come up to room temperature. Cold cheese is harder to spread.
Expert Tip
Think of this cheese ball as a blank canvas. Once you’ve made the base recipe a couple of times, the variations are endless. A handful of minced fresh parsley stirred into the cheese can give it a fresh herby finish. The sky is the limit.
Spiced Nuts – Roll the cheese ball in chili-roasted pistachios, spicy candied pecans, or homemade spiced nuts for a kicked-up version. The same base cheese ball ends up tasting like a different snack entirely.
A Little Citrus Zest – Add a quarter teaspoon of lemon zest or orange zest to the mixture along with the seasonings. A little goes a long way, so start small and taste before you add more.
Mini Cheese Balls – Form the mixture into one- or two-bite portions instead of one large ball. Roll each in nuts and arrange the mini cheese balls on a platter with toothpicks. (Great for a buffet table where you want everyone to have their own.)
Worcestershire Floor and Ceiling – Half a teaspoon is the gentlest version. A full teaspoon makes the savory edge much more pronounced. I usually land at three-quarters of a teaspoon, but if your family loves Worcestershire on everything, lean toward the full amount.
Serving Suggestions
I love adding this sharp cheddar cheese ball to a meat and cheese tray. If you’ve never built one before, my guide to cheese board making is a great place to start. Sometimes I keep it simple, and just serve the ball with crackers, pretzels, and some vegetables and call it a day.
For something a little fancier, add a small bowl of habanero peach jam or cranberry pepper jelly alongside the cheese ball on your board. The sweet-spicy hit against the creamy cheddar is a real treat. Dinner is snackable!
Make Ahead & Storage
Make Ahead – This is an ideal recipe for making ahead. The sweet spot, freshness wise, is anywhere from a couple of hours to two or three days after you make it.
How to Store – The more airtight the container, the longer the cheese ball will keep. In a vacuum-sealed container, it should be fine for up to two weeks in the refrigerator. In a zipper-top bag with the air squeezed out, it’s good for up to a week. On a plate covered with plastic wrap, eat it within five days.
More Cheese Ball and Dip Recipes
No you do not, but it sure does make life easier. A sturdy spoon and a little extra effort will get the job done if you don’t have an electric mixer handy. The texture will be a little coarser, but the flavor is the same.
If you serve it straight from the refrigerator, the cheese is hard to scoop and will absolutely destroy any crackers or more delicate dippers you try to serve with it. Thirty minutes on the counter softens it just enough to spread cleanly without making a mess.
Plenty of good options. Chopped fresh herbs like parsley or cilantro, crumbled crispy bacon bits, crushed pretzels, crushed bagel chips, or everything bagel seasoning all work beautifully. Use whatever you’d happily snack on.
You can safely substitute Neufchatel cheese, which is also sold as 1/3 less fat cream cheese. Avoid fat-free cream cheese though, because it contains more water and might give you a soft cheese ball that doesn’t hold its shape.
I don’t recommend it for a couple of reasons. First and foremost, pre-shredded cheese is coated in a clump-preventing starch or cellulose. It does its job very well in the bag, but it can prevent your cheese ball from holding together well, and it can yield a dry-textured cheese ball. Freshly grated cheese provides better flavor and better stickiness in this recipe.

Cheddar Cheese Ball
Ingredients
- 8 ounces cream cheese
- ½ teaspoon garlic powder
- ½ – 1 teaspoon Worcestershire sauce
- 1 cup freshly grated sharp cheddar cheese
- ½ cup chopped walnuts or pecans
Instructions
- Place the cream cheese in a large mixing bowl and beat with an electric mixer until smooth, about 1 minute. Scrape the sides of the bowl and sprinkle garlic powder over the cream cheese. Add the Worcestershire sauce. Mix again until well combined, about 1 minute.
- Add the cheese and mix again. Spread plastic wrap on the counter and scoop the cheese mixture onto it. Form into a ball with the spatula.
- Place the chopped nuts on a small plate. Gently roll the cheeseball in the nuts to coat it completely. Wrap the finished cheese ball in plastic wrap and refrigerate until ready to serve.
- Remove from the refrigerator at least 30 minutes before serving. Serve with crackers and fresh vegetables.
Nutrition
Nutrition information is automatically calculated, so should only be used as an approximation.