This post could also be called, everything I wish I’d known that no one ever mentions about cooking turkeys. If you’ve been roasting chicken and turkey for years, this post is probably not for you. On second thought, it IS for you. Feel free to add whatever tips you’ve discovered in your own experience with turkey. I find that I learn something new every single year, just by talking turkey with other people.
I made my first turkey over a dozen years ago and it was the most intimidating thing I had ever cooked. Truth be told, my husband did most of the cooking that year. At that point in my life, I had never even touched a whole bird. In the years since then, I’ve tried a few different methods of roasting. Here’s the thing, all the different methods work. The simplest methods can easily produces delicious cooked turkey.
First things first, make sure your turkey is completely thawed. That means, remove the turkey from the freezer and thaw it in your refrigerator at least 3-4 DAYS before the day you plan to cook it. Allowing your turkey at least 5 hours per lb to thaw is usually a good method of determining when to start thawing it. When you are putting it in the refrigerator, make sure to put a large dish underneath it.
I always set my huge turkey in a 9×13 pan inside the fridge. It doesn’t actually fit there, but the pan serves to collect any liquid from the turkey as it thaws. You don’t have to do this, but if you have a dripping turkey one year, you will never forget again. (I actually do this with all meats thawing in the fridge.)< Remove the turkey from the refrigerator an hour before the time you plan to cook it. The idea is to get the bird somewhere closer to room temperature before placing it in the oven. Handle the turkey with the same care you would handle any other raw meat. Have paper towels nearby to wipe up any mess. Wash your hands carefully, throughout the process.
Preparing the turkey for cooking is not difficult at all, but it can be messy. You will need to remove the neck and giblets from the turkey prior to baking. I throw mine away (yes, Mom, I still refuse to use them for gravy) but you can also save them for making the gravy. Some people cook the neck alongside the turkey, but I never have.
Whether or not you choose to truss your turkey is up to you. “Trussing” is the practice of tying the legs and wings down compacting them against the body of the bird. Most of our grandmother’s did this and it does create a much more attractive cooked turkey. If you are interested in trussing your bird, here is a great Alton Brown video on How to Truss a Turkey.
Now that I rambled on about how cool it is to truss your turkey, I am going to tell you that many chefs today recommend not trussing the bird at all. When you compact the bird this way, it takes longer to cook all the way through the leg joints. This increases the risk of the breast meat drying out. Most of the time, I’d rather have the turkey all sprawled out and perfectly cooked versus looking picture perfect.
Wash the turkey, inside and out with cold water. Pat it dry with paper towels. You can use whatever seasonings you prefer at this point to season the bird. I usually rub the turkey with butter, tucking some little pats inside the breast skin. Then sprinkle spices generously on the outside of the bird and rub them in a bit. Sage, garlic, salt and pepper are often used for this.
Place the turkey in a roasting pan, preferably one with a rack, and tent it well with foil. I always pour 4 cups of water into the bottom of my pan and I never baste my turkey through the cooking process. I usually cook mine (average size 15-16 lbs) at 325 for about 4 hours. As a general rule, 15 minutes per lb of turkey usually gets the job done. The more frequently you open the oven door and check the turkey, the longer it will take. Oven temperatures vary though and after about 3 hours, I always start checking the temperature.
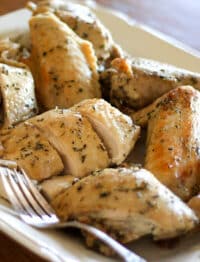
The real goal of cooking any turkey is to not dry out your bird. There isn’t a secret, there isn’t a magic trick, simple use a thermometer and remove your bird when the thigh meat reaches 170 degrees or the breast meat reaches 160 degrees. The temperature will continue to rise as the turkey rests on the counter.
The goal temperatures are 175 for the thighs and 165 for the breasts. Following this rule has never failed to produce moist and flavorful breast meat. That is the most important part, right? ( I actually prefer mine without the gravy, but it looked naked in the original picture. So, here you see it fulled dressed in gravy. A turkey should never be so dry that it requires gravy in order to be eaten!)
Always test whether the meat is done by using the thermometer. Never cut through the meat to check the color. I can’t tell you how many meals I dried out by cutting into perfectly cooked meats and letting all of the juices flow out into the pan or onto the cutting board.
If you do not have a thermometer, you can spear the breast with a sharp knife and make sure the juices run out clear and not pink. However, you should be extra careful not to actually cut open the breast too much as you are checking this way, or you will dry out a portion of it.
Once you remove the turkey from the oven, let it rest for at least 15-20 minutes. If you do not do this, the juices from the turkey will run out and result in a dry bird. Plus, you are very likely to scald yourself with the burning hot juices!
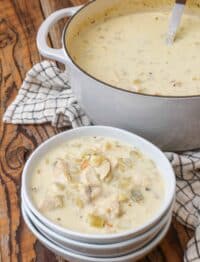
When your turkey is carved serve it with Balsamic Brown Sugar Sauce and you are sitting down to a great meal that you have created for your family and guests, Enjoy! You have earned it!