Once again, my CSA Box contained a vegetable I hadn’t seen before. As I seem to be saying every week, I am really enjoying playing with all of this new produce.

My kids think it is exciting to try new foods each week and I’m enjoying the challenge, as I find new uses for it all. I have to say that we all really enjoyed the flavor of the daikon radishes raw and as a bonus, they were really pretty too.
I wanted to do something a little different with the rest of them though.

My husband especially enjoyed these. He compared them to a lot of the foods he enjoyed while living in Korea many years ago.
Overnight Chinese Daikon Radish Pickles
Recipe slightly adapted from and with thanks to Allrecipes.com
Ingredients
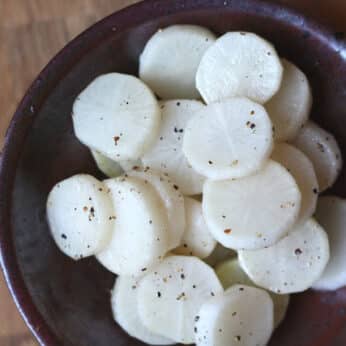
- 2 cups peeled and sliced daikon about 1/4" thick
- 1 1/2 teaspoons kosher salt
- 1 1/2 tablespoons rice vinegar
- ¼ - 1/2 teaspoon freshly ground black pepper adjust to taste
- 1/2 teaspoon sesame oil
Instructions
- In a small mixing bowl, sprinkle the salt over the radish slices and toss to combine. Let it rest in the refrigerator for at least an hour. This will help the radishes soften and release some liquid.
- Drain the water from the bowl and rinse the daikon well. Pat them dry with a towel and then return to the bowl. Stir in the remaining ingredients and toss well to combine and coat all the slices. Cover and refrigerate at least 8 hours. Enjoy!
Tried this recipe?Mention @barefeetkitchen or tag #barefeetkitchen!