Creamy, sweet Homemade Ice Cream is a cool treat on a warm day and a fun snack for pretty much any night of the year.
I’ve had several requests for more non-dairy and vegan ice cream recipes lately and because of that, I’m happy to finally be sharing this recipe with you.
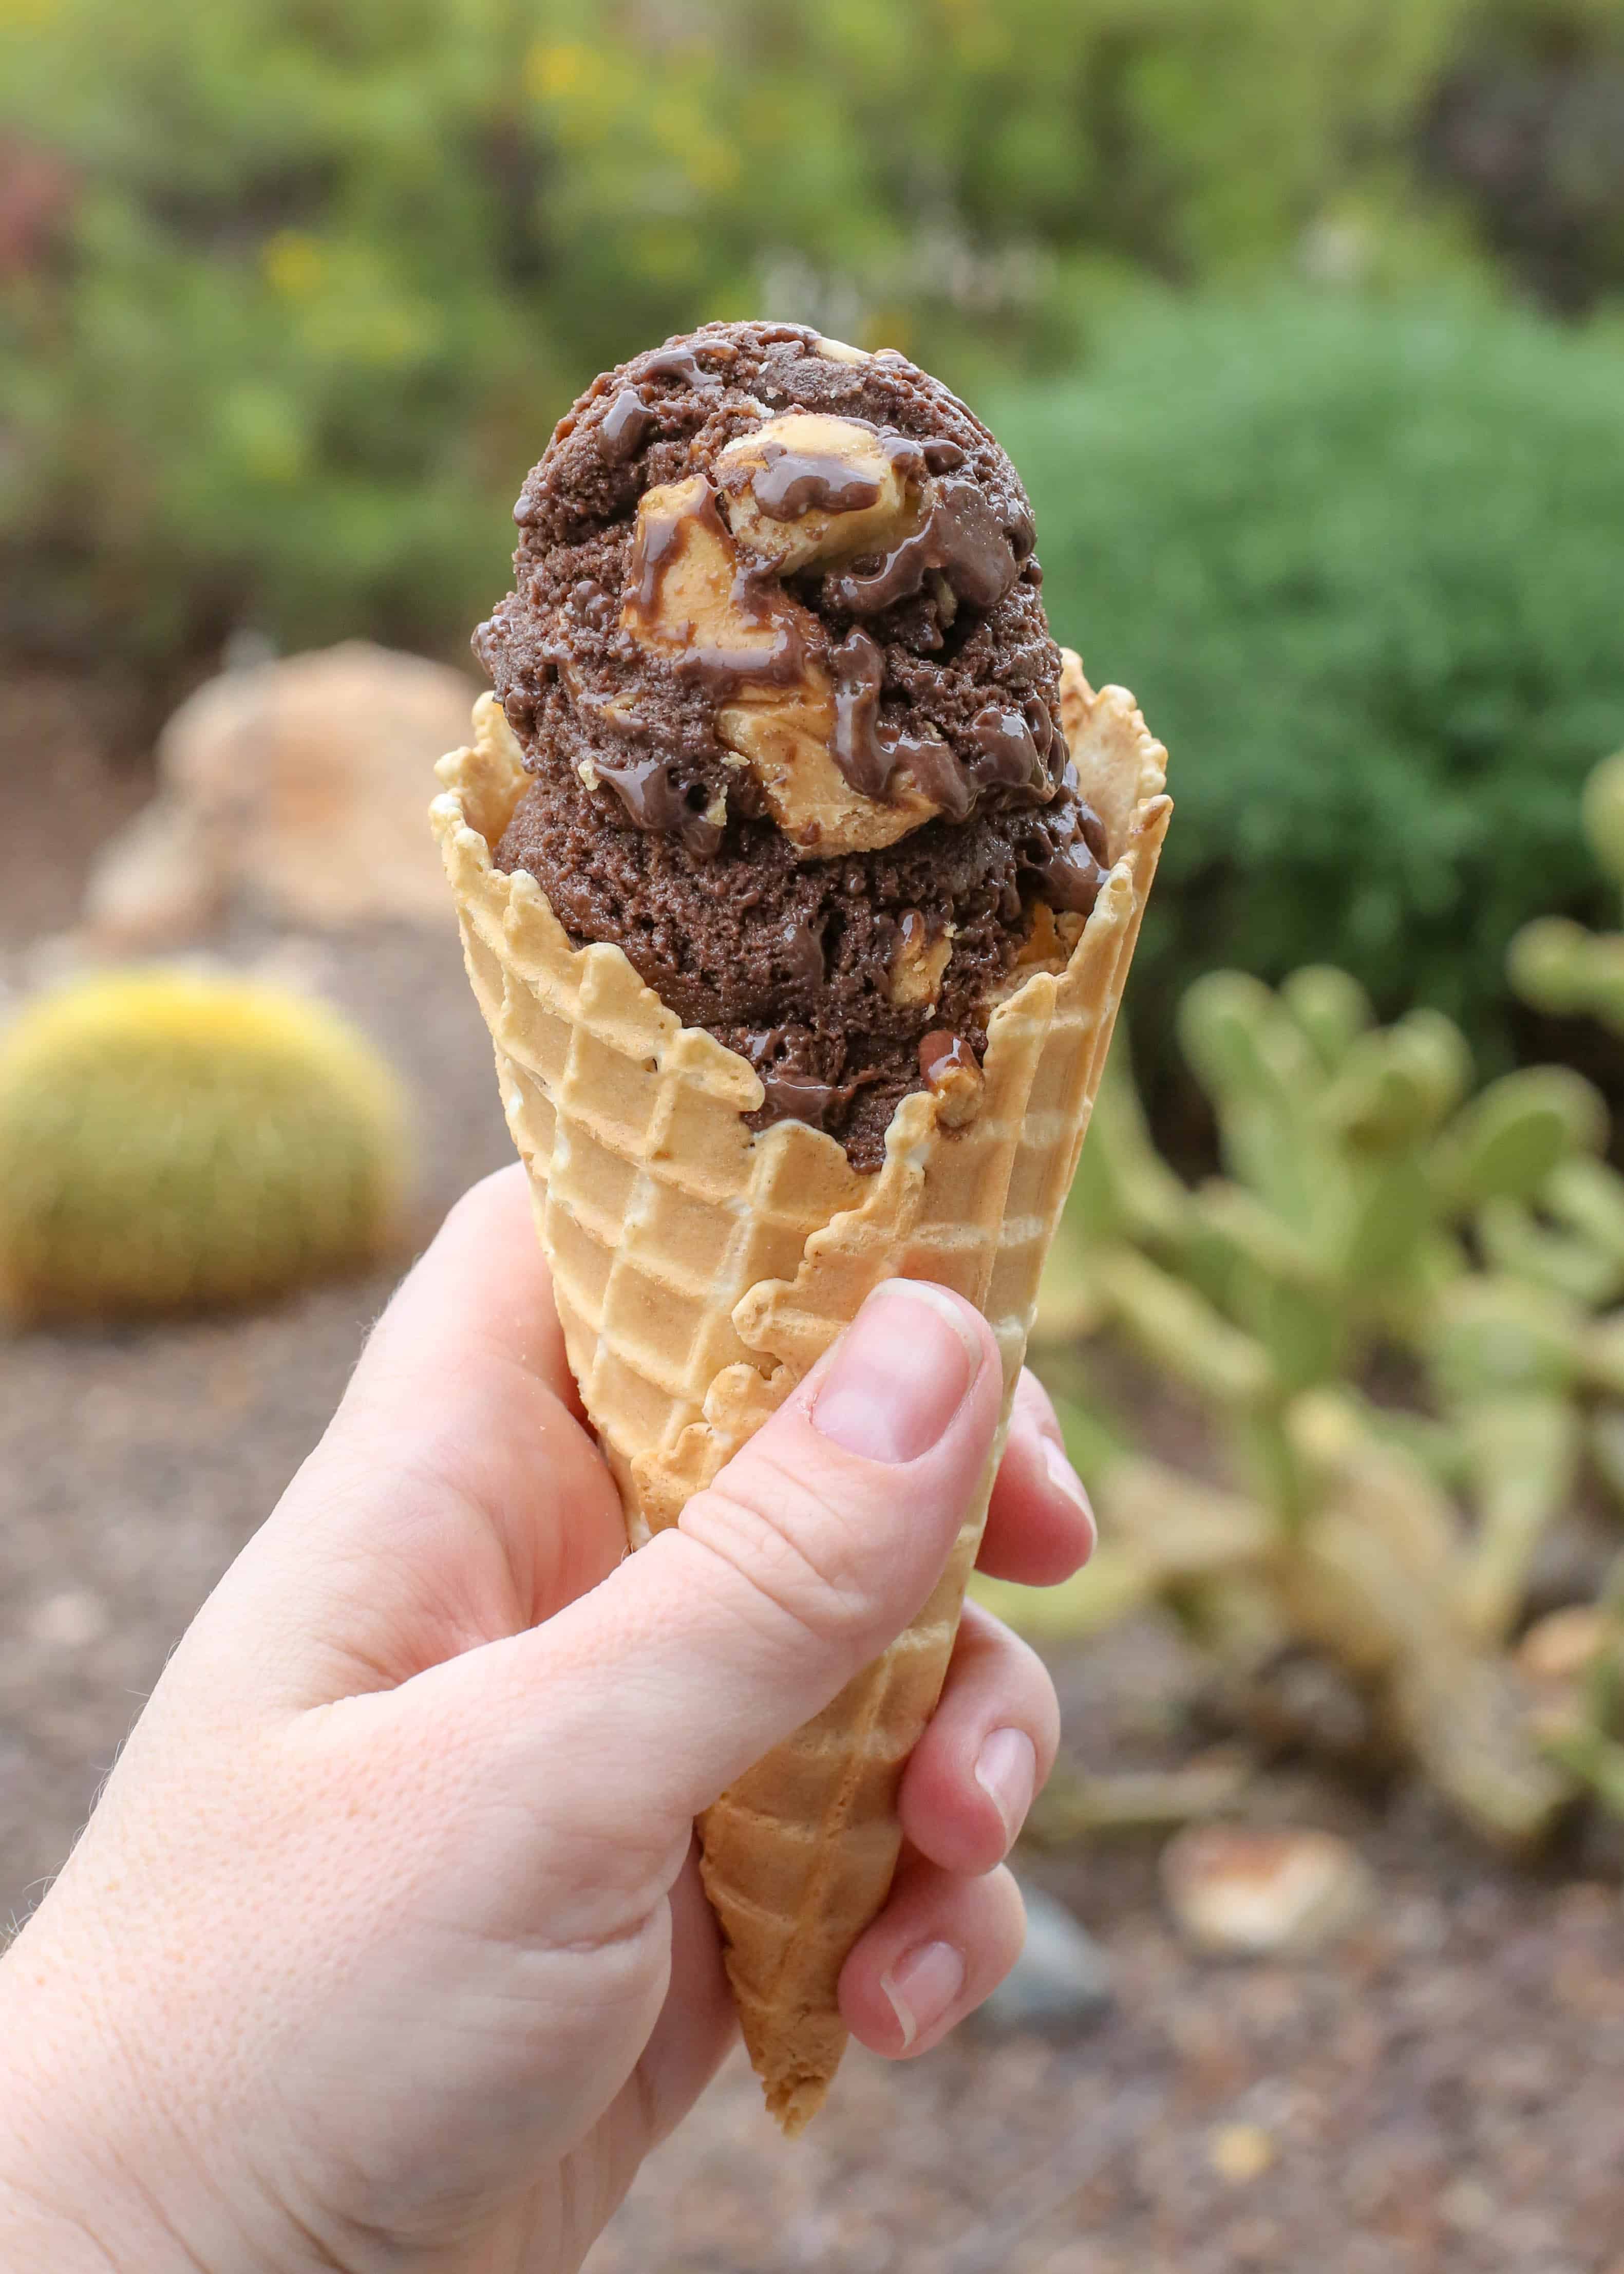
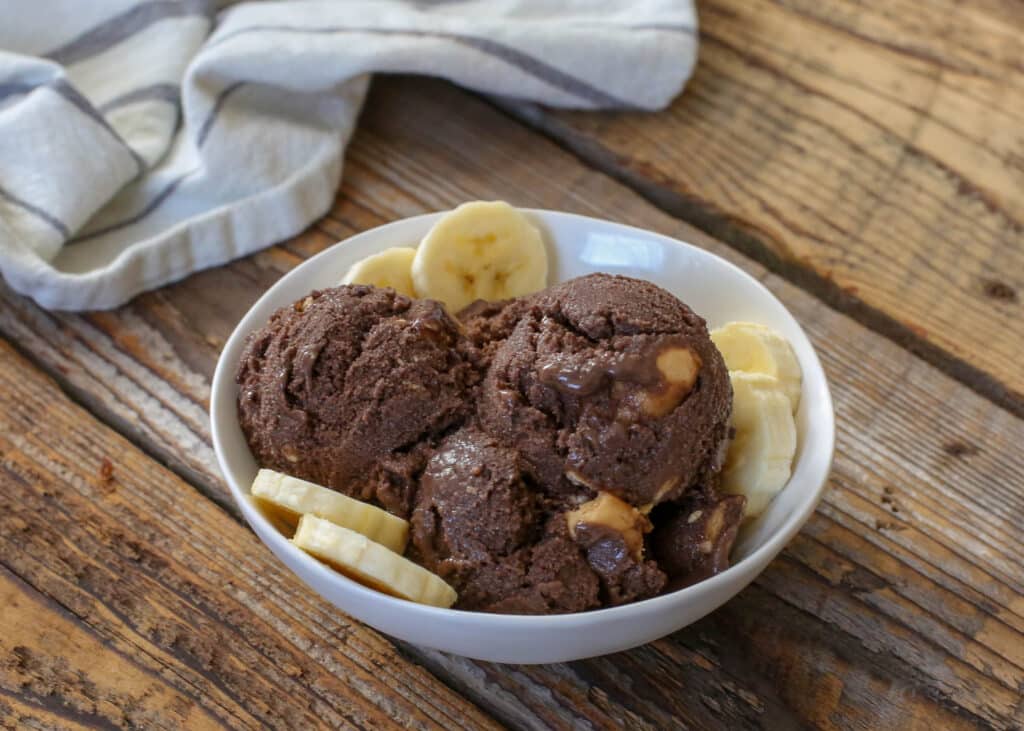
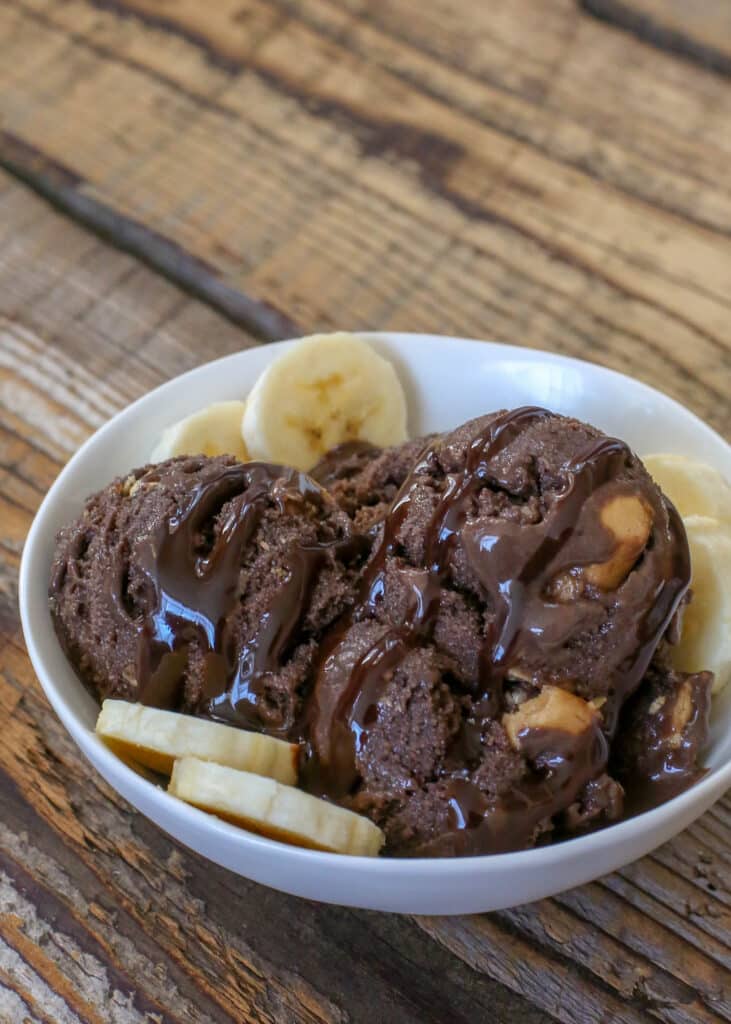
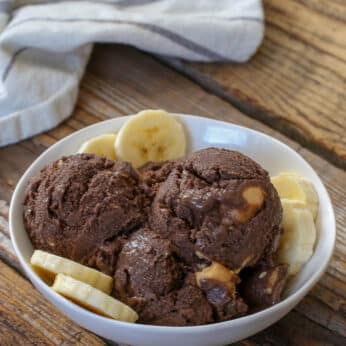
Made without a drop of cream or dairy milk, this Chocolate Peanut Butter Ice Cream is a non-dairy and vegan ice cream that my boys devour.
 My family is now and likely always will be full of dairy lovers. My boys easily drink over a gallon of milk a day and I often take for granted our love for dairy. It’s a great fit for our lifestyle.
However, I have friends and family, in addition to many readers, who don’t tolerate dairy due to allergies. Because of that, I’m always on the lookout for truly tasty alternative milks.
When I saw the new plant protein milk choices from Bolthouse Farms, I was intrigued and couldn’t wait to try them.
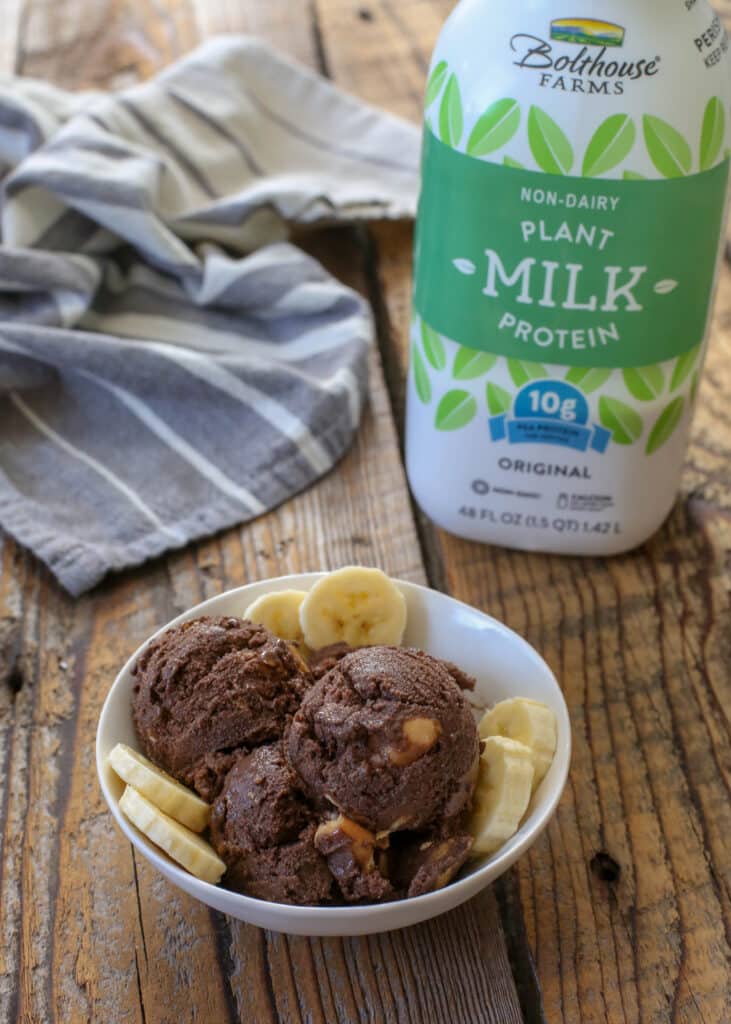
Bolthouse Farms® Plant Protein Milk is a non-dairy plant-based alternative to traditional dairy. There are four flavors available now. We tried the original plant protein milk and liked it.
Bolthouse Farms® Plant Protein Milk contains 10 grams of pea protein per serving, making this a solid choice over some of the other alternative milks on the market.
I’m happy to tell you that the flavor of the original milk was quite good, slightly sweet and without any strange aftertaste.
{Accidentally} Vegan Ice Cream
Chocolate Ice Cream loaded with chunks of sweet peanut butter proved to be irresistible for my youngest two boys. The kids went a bit nuts over the peanut butter chunks filling this chocolate ice cream.
The whole batch was almost gone within a few minutes of my shooting these photos. (And then turning them loose on the ice cream in the freezer.)
I made this a couple of times before I thought to puree a banana into the recipe. It makes all the difference. It adds a creaminess and serves to thicken the ice cream nicely as well.
As a bonus, are there any ingredients that pair better with bananas than peanut butter and chocolate?

(Speaking of bananas and chocolate, if you haven’t already made these Chocolate Covered Banana Bites, you’ll want to do that immediately. This is a must-have sweet snack for the freezer.)
Dairy Free Chocolate Ice Cream that doesn’t taste dairy-free and doesn’t have any hint of coconut? YES! It is possible and it is fantastic!
Vegan and non-dairy recipes aren’t my specialty, but when I accidentally make something that fits into those categories? It kind of makes my day, because I know that for several of you, non-dairy recipes are your way of life.
The most popular question I get is whether it’s possible to make ice cream without a machine. The answer is YES. You can make ice cream without a machine. Find the full directions here!
Chocolate Peanut Butter Ice Cream
Ingredients
For the Chocolate Ice Cream
- 2 cups Bolthouse Farms® Original Plant Protein Milk
- 2 medium bananas
- 1/3 cup white sugar
- 1/2 cup chocolate syrup (Hershey’s syrup will work nicely as well)
- 3 tablespoons dark cocoa powder
For the Peanut Butter Swirl
- 1 cup creamy peanut butter
- 1 cup powdered sugar
Instructions
- To make the ice cream: Combine the plant milk, bananas, chocolate syrup, and cocoa powder in the blender. Blend until smooth. Pour into your ice cream machine and churn according to the manufacturer’s instructions.
- To make the peanut butter swirl: When the ice cream has about 10 minutes left to churn, place the peanut butter in a medium size glass bowl. Heat in the microwave for about 60 seconds, until liquid. Stir and add the powdered sugar. Stir or whisk again until smooth.
- Scoop the peanut butter mixture into a plastic freezer bag and seal closed, while removing any extra air.
- To combine the peanut butter swirl with the ice cream: Scoop the finished ice cream into a freezer safe container. Use a pair of scissors to snip a corner off the bag with the peanut butter. Squeeze the peanut butter over the ice cream and then swirl with a knife. The peanut butter will harden very quickly and form bite-size chunks. (It shouldn’t be liquid at all.)
- Place the airtight container in the freezer for at least a couple hours to firm up completely before serving. Enjoy!
Nutrition

Disclosure: I’ve partnered with Kroger and Bolthouse Farms to share this recipe with you. #BolthouseFarmsatKroger Thank you for supporting the brands that help make Barefeet In The Kitchen possible. As always, all thoughts and opinions are my own.


Rate & Comment